24 Feb Making mead at home: a beginner’s guide
What is mead?

Perhaps THE original fermented beverage, mead predates both wine and beer. It was sipped by the ancient Greeks – who considered it to be the drink of the gods – and by the Romans, Vikings, Ehtiopians & many other civilizations. It was thought to be discovered by accident – when rainwater mixed with honey was spontaneously fermented by natural, wild yeasts. The result was something drinkable (and potent). Mead has likely been around for as long as honeybees have!
Modern mead is a celebration of farm to table pursuits, with local honey as the centerpiece of this delicious fermented drink. While it’s only made with honey, water and yeast, there is complexity in mead’s simcity. Basic ingredients provide opportunity for creativity and experimentation using fruit, spices or unique varieties of honey!
Mead comes in many forms – it can be still or sparkling; sweet, semi-dry or dry; flavored or plain. The Craft a Brew Mead Kit helps you create a gallon of still, semi-dry mead. You can always add flavor or make a variation of mead – like a Cyser (apple mead) or a Melomel (a fruited mead).
What you need to start making mead

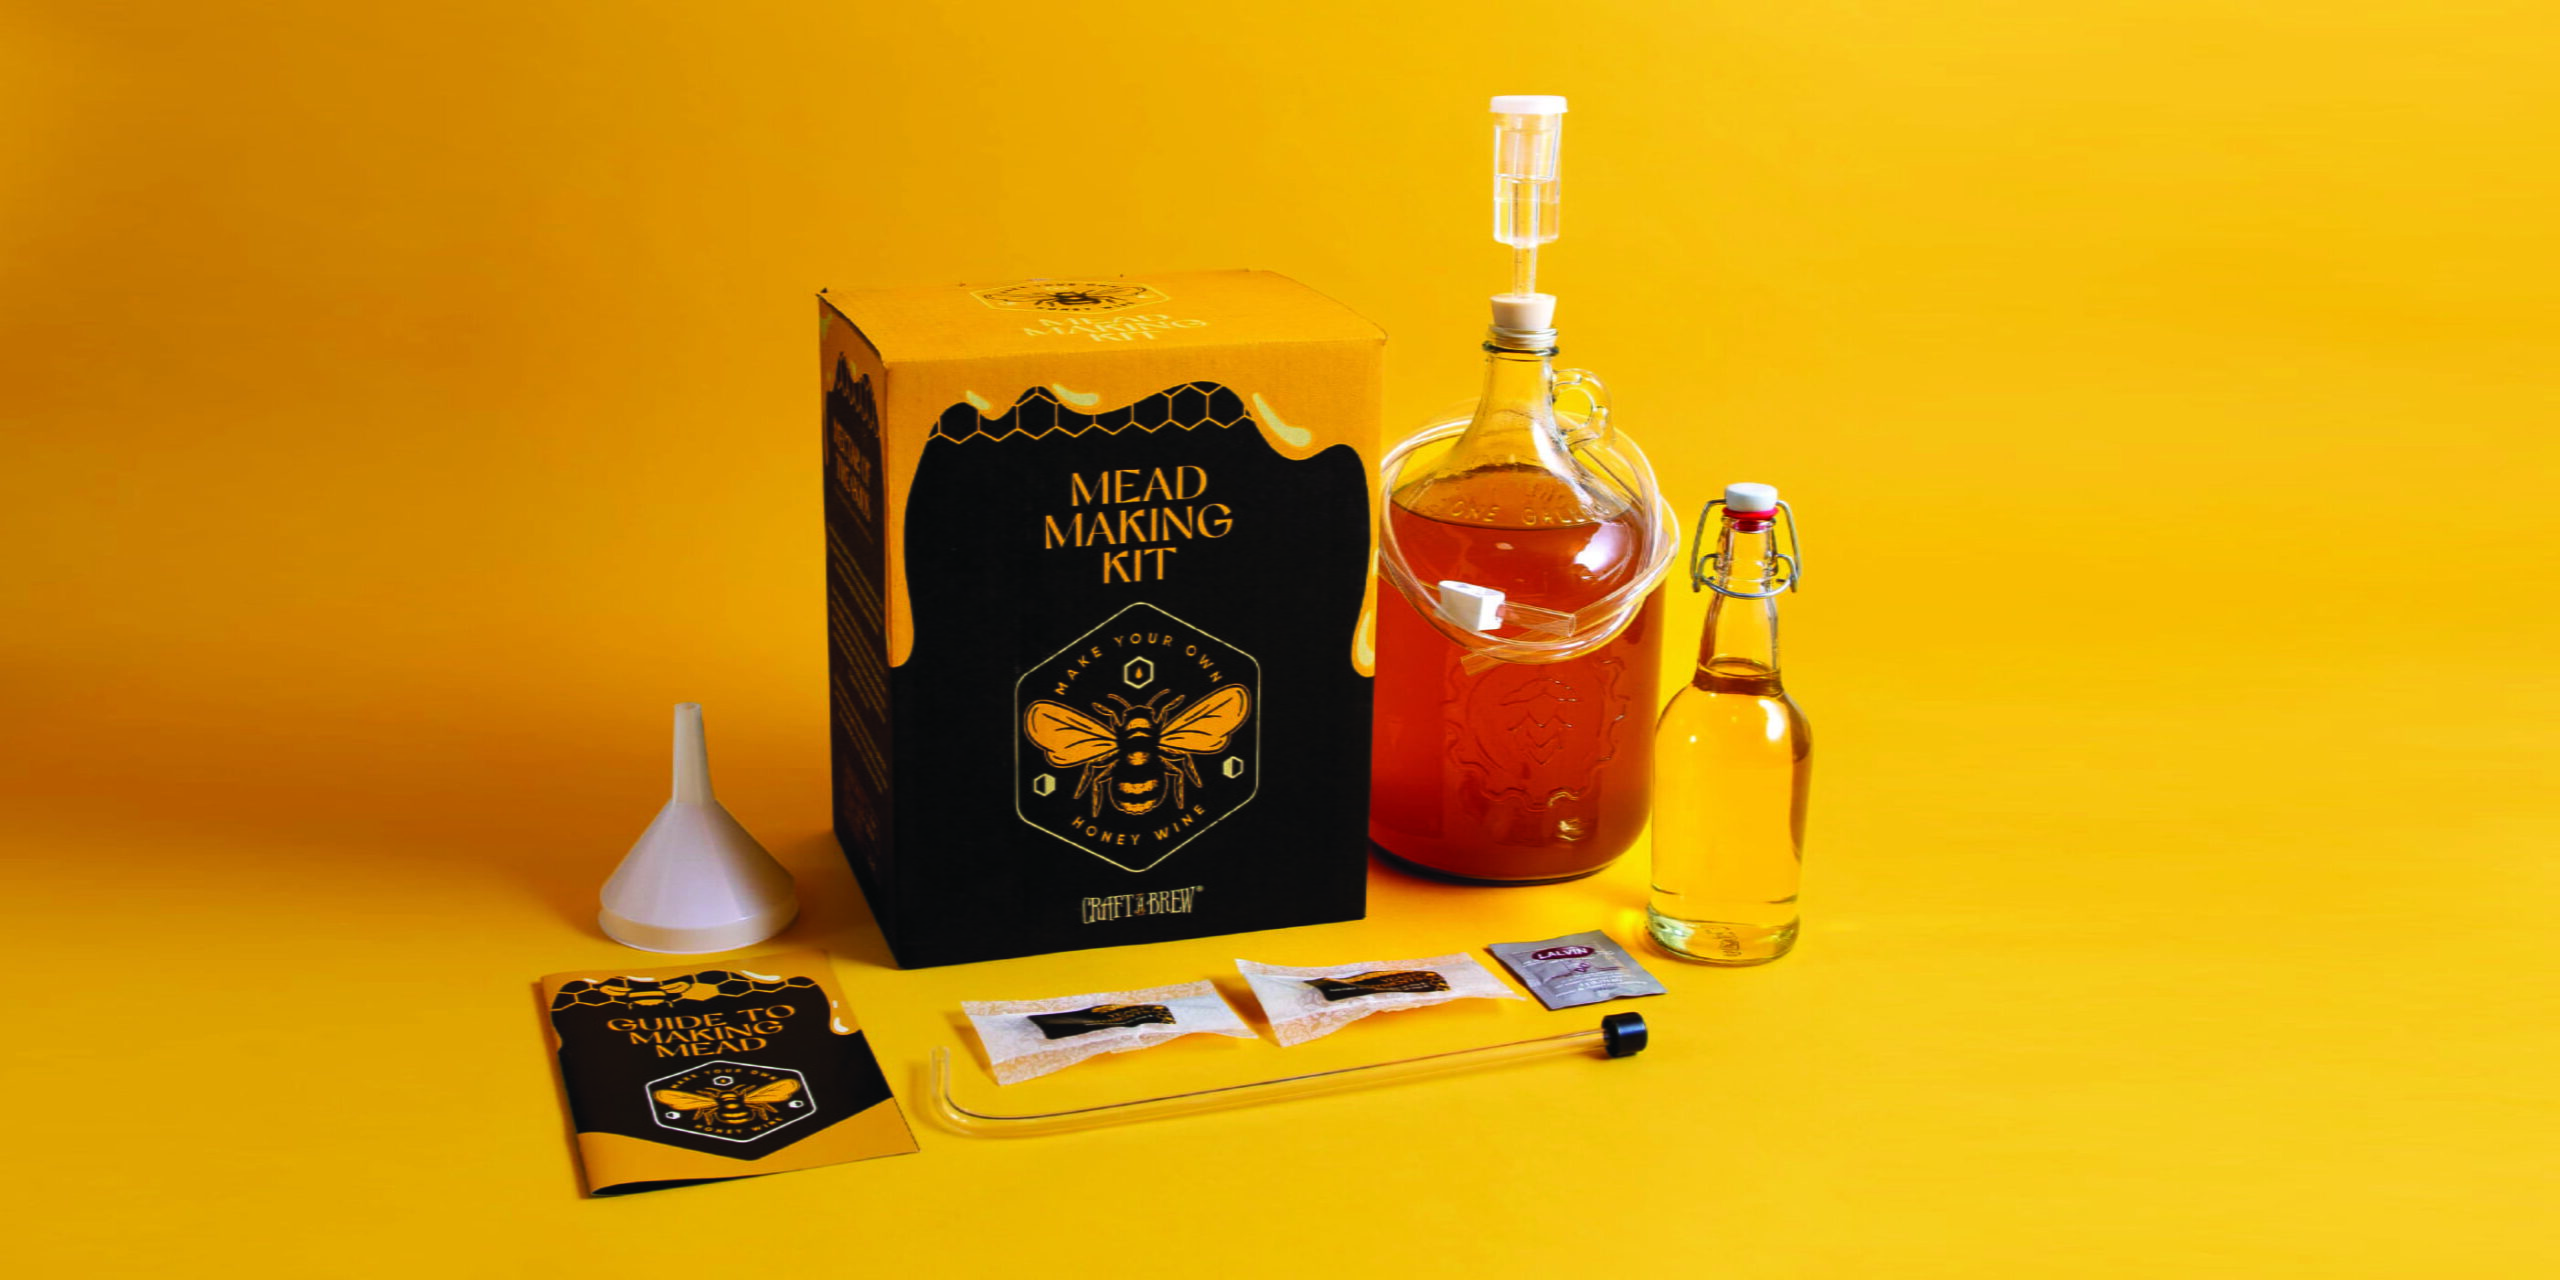
You don’t need much to craft your first gallon of mead! A few essential components & some basic ingredients. If you’re a homebrewer, you may already have all the necessary equipment. If you’re just getting started, our Mead Kit includes everything you need in one box – no experience required!

Equipment
- 1 Gallon Glass Carboy (fermenter)
- Rubber Stopper
- Airlock
- Transfer Tubing + Tube Clamp
- Racking Cane & Tip
- Funnel
You’ll need bottles to age & store your mead. A gallon of mead will yield ten 12oz bottles or eight 16oz bottles. You can reuse bottles from beers or ciders you drink at home – we like Grolsch swing-top bottles. You can also try an all-in-one bottling kit for your mead, complete with bottles and caps.

- Swing-top Bottling Kit – includes eight clear swing-top bottles, no caps needed. Great for observing the color & clarity of your mead as it ages.
")
- Deluxe Bottling Kit – includes ten amber pry-off beer bottles, 30 bottle caps & a capper tool. The capper tool can also be used with recycled pry-off beer bottles if you decide to scale up your mead making hobby!
Ingredients
Mead is made using just a few ingredients: honey, water & yeast. You bring the honey, our Mead Kit brings the rest!

Honey
You’ll need to source 2.5 lb of honey for your homemade mead. Many honey brands offer 40 oz bottles that are perfect for your first batch of mead – like Target or Trader Joe’s. You can choose to use a single variety of honey or you can use a combination of honey types in a single batch. Choosing the right honey is important, since its flavor profile is the foundation of your mead. ANY honey variety can be used to make mead. Honey is named for the flower the nectar was collected from. We recommend using 100% natural honey for the best results. Here’s what you can expect from a few of our favorite varieties:
-
-
- Clover Honey: classic and widely available, this honey is sweet with a gentle tangy aftertaste.
- Orange Blossom Honey: floral, fruity and citrusy. This variety is best sourced from a reputable supplier or a trusted local farm, because it can often be artificially flavored.
- Buckwheat Honey: dark, strong, earthy and slightly spicy. Best used in combination with another variety of honey for balanced flavor.
- Tupelo Honey: floral, often sweeter and more “buttery” than other honey varieties. Considered by many to be the gold standard of honey and a favorite among mead makers.
- Wildflower Honey: flavors vary in each region and season. This is the name given to honey made from the nectar of multiple flowers (or whenever the bees’ diet is unknown). No two batches are alike! A bit less predictable in flavor, but often affordable and easy to find.
- Meadowfoam Honey: tastes like toasted marshmallows and smells like vanilla. Need we say more?
-

Yeast
Yeast is a living organism (technically a fungus) that converts sugar from honey into alcohol and releases CO2 in the process. The yeast strain in our Mead Making Kit (ICV-D47) leaves some residual sweetness and honey aroma in the finished product. It also produces compact yeast for improved clarity.
-min")
Yeast Nutrients
Honey isn’t as nutrient dense as other fermentable sugars (beer malts, wine grapes or cider apples), so mead usually requires you to add nutrients. Our Mead Kit includes nutrients that keep the yeast healthy throughout fermentation by providing nitrogen that honey lacks. If you try to ferment yeast & honey alone, the yeast will get stressed, stop fermenting and likely produce off-flavors.
Water
Just like honey, water is an equally important and foundational ingredient in your mead. For the best results use spring water – simply pick up a gallon from the store. If your tap water is filtered, safe to drink and tastes good, then it can be used to make mead. If you wouldn’t drink water from your tap, we wouldn’t suggest using it to make your mead. We also advise against using distilled water because it is stripped of minerals that actually help the yeast during fermentation. Remember, you’re adding nutrients to your honey to help the yeast, so you want to make sure the water doesn’t hinder the fermentation.

If you already have your own equipment and you only need ingredients, try our Mead Recipe Kit. It includes our Guide instruction manual, yeast, yeast nutrients, and sanitizer to make mead with your own fermenter.
Instructions for making mead in 30 days:

These are general instructions for crafting a 1 gallon batch of still (not sparkling), semi-dry mead. This mead recipe yields an ABV (alcohol by volume) of 11 – 12 %. While it’s ready to drink after 30 days, mead improves with longer term aging. Recommendations for aging are further down in this post.
DAY 1
Sanitize your equipment

- Proper sanitation is considered one of the most important steps of the mead making process. Yeast is the only organism that you want coming in contact with your mead. Any other bacteria can quickly spread, making the mead undrinkable. Our kit includes a packet of sanitizer – you’ll use half of it to sanitize your fermenting equipment today. Reserve the rest for bottling. Dissolve half of the packet of powdered sanitizer with one gallon of tap water and soak all fermentation components (carboy, funnel, rubber stopper & airlock) in the mixture for 60 seconds. Let everything dry on fresh paper towels – there is no need to rinse with water. Equipment doesn’t need to be completely dry, it can be slightly wet, before you begin step 2.
SANITIZING TIP: pour the sanitizing solution directly into the carboy & fill with water. This helps you easily measure out 1 gallon of water AND helps you easily sanitize the fermenter. After the carboy has soaked for 60 seconds, you can pour the contents into a large pitcher, bucket or bowl to soak the airlock, stopper, funnel, etc.
- Gather 2.5 lb of honey and 1 gallon of spring water. Pour only HALF a gallon of water into the sanitized jug using the funnel.
- Next, pour about ⅓ (one third) of the honey into the carboy. Then, plug the top with the sanitized stopper and cover the hole with your clean thumb. Swirl and shake until the honey is completely dissolved. Continue to add the rest of the honey ⅓ at a time, shaking to dissolve each time. Once all 2.5 lb of honey is added, you now have “must” – a winemaker’s term for unfermented wine.
- Before adding more spring water, add the entire packet of DAY 1 yeast nutrients to the carboy and shake to dissolve. The other packet of yeast nutrients will be used on day 2 & day 5 of fermentation.
- Now, add spring water to the carboy until you reach the ‘one gallon’ fill line (just above the raised embossed letters on the carboy). Place the stopper back in, cover the hole and shake for one full minute. This gives the yeast plenty of oxygen to begin fermentation. Cut open the yeast packet and add the entire contents to the carboy. Assemble and fill the airlock with water (to the fill line) and gently insert it into the stopper – you don’t need to push hard. Then, place the stopper in the carboy – it will stick out a bit. Drying the stopper and inside lip of the carboy with a paper towel will help it stay in place.
- Set an alarm for 24 hours from now – that is when you’ll add the next dose of yeast nutrients. Your mead will need a cool, dark place to ferment for the next 30 days. The ideal fermentation temperature range is between 65°-73°F.
DAY 2
Degassing – Part 1
Make the must
After a full 24 hours of fermentation, you will need to “de-gas” your mead in order to release CO2 buildup and prepare it for the next dose of yeast nutrients. These next few steps can create a geyser of foam if you don’t work SLOWLY and in small increments. We advise reviewing steps 7-9 before you begin.
- Remove the airlock and begin degassing your mead by slowly swirling the sealed jug, holding the stopper in place. Start gently and stop as needed to allow foam to dissipate. Once foam subsides, begin to swirl more vigorously for at least 2 minutes. This process helps release built up CO2 and keeps yeast healthy.
- Once your mead is degassed, pour HALF of the DAY 2/DAY 5 yeast nutrients into a small bowl. Reserve the other half for step 11. Remove the rubber stopper. Scoop out about ¼ (one quarter) of the yeast nutrients from your bowl and VERY SLOWLY sprinkle into the carboy. Mead may immediately begin to foam – swirl the carboy to help it dissipate. Once the foam subsides, continue adding the rest of the DAY 2 yeast nutrients in TINY increments. This process may take 5+ minutes.
- Wait until foaming stops. Seal your carboy with the stopper and swirl again for 30 seconds to mix the nutrients into the mead.
- Place the airlock back into the stopper and let your mead continue to ferment. Mark your calendar for 3 days from now – you’ll degas and add more nutrients at that time.
DAY 3
Degassing – Part 2
- Repeat steps 7 – 9 to degas and add the remaining HALF of the DAY 2/DAY 5 yeast nutrients. Remember to work slowly and in small increments to prevent an overflow.
- Let your mead continue fermenting for the next 25 days. Be sure to keep the carboy between 65°-73°F. While your mead is ready to bottle after 30 days of fermentation, the longer you age it in the carboy the more the flavors will continue to develop. So, feel free to let your mead age for a few weeks longer in the carboy!
DAY 6-20
Optional Degassing
- We recommend degassing your mead during this stage of fermentation to ensure that the finished product is crystal clear and free of unwanted carbonation. Degassing keeps yeast productive, which improves the flavor of your finished mead. To degas, swirl and shake the carboy every few days for 2 full minutes, stopping as needed to let foam subside. If you prefer, you can do this just once on day 20 of fermentation (or 10 days before you plan to bottle). Your mead will need to sit undisturbed for 10 days before bottling.
DAY 30
Bottling
We recommend using ten 12oz swing-top bottles (like Grolsch beer bottles) to store and age your mead. You can purchase two six packs and use the empties. Or you can use our Mead Bottling Kit, our Deluxe Bottling Kit or even use recycled pry-off bottles with our Capping Kit.
You’ll use a siphon technique to transfer mead from the carboy into your bottles. This is used in order to avoid stirring up any sediment & to keep sediment out of your bottles. We suggest practicing siphoning with water before bottling day in order to perfect your technique. Watch our how-to video here: https://craftabrew.com/pages/making-mead
- In a large bowl, bucket or pitcher, mix the remaining half of your sanitizer packet with 1 gallon of tap water to sanitize your bottling day equipment: bottles, transfer tubing, tube clamp, racking cane and funnel. Soak all components for 60 seconds to sanitize, making sure to completely submerge or fill bottles with sanitizing solution. Let everything dry on fresh paper towels.
- You will now siphon your mead from the carboy into bottles. To do this, you’ll need a large bowl of fresh, clean water (tap water is fine). Attach the tube clamp to one end of the tubing. With the clamp open, submerge the tubing in the bowl of water. Let the tubing completely fill with liquid and top off using the faucet if necessary. Close the clamp and attach the unclamped end to the racking cane. This is your siphon starter.
- Place your carboy on a high surface (like a tabletop or chair) and place your bottles as low as possible (on the floor). Gravity and distance are essential to start and maintain a siphon. Remove the airlock and stopper and insert the racking cane into the carboy, making sure the end doesn’t suck up any sediment. Hold the clamped end of your tubing low to the ground and over a bowl. Unclamp to release the water from the tube, which will start the flow of mead. Once mead starts to freely flow from the tubing, clamp the tubing shut and set the bowl aside.
SIPHONING TIP: A Mini Auto Siphon makes this process even easier. Just one pump starts the flow for you.
- Using the clamp to start and stop the flow of mead, fill each bottle and stop when the mead reaches the base of the bottle neck. Repeat and seal each bottle.
- Store your bottled mead in a dark, room temperature place and out of direct sunlight. While it’s ready to drink on bottling day, your mead’s flavors really shine when aged longer. Set a few bottles aside for a tasting in a few months (or years)!
Aging your mead

While your mead can be bottled and enjoyed after just 30 days of fermentation, its flavors will really shine and improve when aged longer. Additional aging allows flavors to mature, refine and become more complex.
Feel free to sneak a taste on bottling day, but know that it will likely taste “young.” Fresh mead may have some bitterness or tartness, but the flavors will improve with aging. Go ahead and set bottles aside with different aging timelines. For example:
-
-
- Let one or more bottles age for 30 days in bottles before drinking.
- Let one or more bottles age for 3 months in bottles before drinking.
- Let one or more bottles age for 6 months in bottles before drinking.
- Let one or more bottles age for 1 year in bottles before drinking.
- Let one or more bottles age for 2 years in bottles before drinking.
-
Long term aging (and patience) are key to the best tasting finished product. Many mead makers swear by aging bottles longer than a year. We know it can be tough to wait, but once you sip your first long-term aged mead you’ll see exactly why people do it.
Keep a journal and take notes whenever you taste a bottle. This will help you chart the flavor development over time so you can improve your mead and determine the best timeline for your palate.
Recipe Variations
Mead is delicious on its own, but you can experiment with fruit, spices and other ingredients for a truly unique creation. We recommend picking up an Extra Fermenter Kit & a Mead Recipe Kit so you can keep a few batches of mead aging side-by-side.
Cyser
A mead fermented with apples is called a Cyser. To make a Cyser, follow our instructions – just use apple juice or cider instead of spring water. Juice adds fermentable sugar (& about 5% ABV) to your mead, so your mead will need to ferment for an additional month before bottling. Use preservative-free juice (NO Potassium Sorbate). To make a spiced Cyser, add a cinnamon stick to the carboy in the last week of fermentation.
Melomel
A mead fermented with fruit is called a Melomel. To make a Melomel, add 1 – 2 lb of fruit to the carboy after 2 weeks of fermentation. This prevents fruit flavors from being fermented out. Fruit should be pureed, strained, then boiled for 5 minutes – let completely cool before adding to the carboy. This process reduces the risk of contamination from wild yeast on fruit skins. Be sure to reduce your spring water volume accordingly on DAY 1 to leave enough room for added fruit. Allow mead to age on the fruit for 3+ weeks before bottling.
Ferment other beverages at home
If all this talk of making mead has you eager to try other beverages, you might enjoy these blog posts:
")

")