26 Oct How To Use A Beer Making Kit – Homebrewing 101
Homebrewing is a time-honored tradition, popularized by Charlie Papazian in the 1970’s. He wrote the book (literally!) on homebrewing: The Complete Joy of Homebrewing. While his book is a wonderful primer and introduction to the world of beer brewing, you don’t need to hit the books before trying for yourself. Our all-in-one home beer making kit teaches you about how beer is made as you brew it!
If you have dreams of opening your own brewery someday, you’ve got to start somewhere (and you’re in the right place)! With a Craft a Brew beer making kit you’ll learn the process and brew some great beer along the way.
")
Homebrewing uses the same fundamental process and ingredients as your favorite commercial brewery, but scaled down to 1 or 5 gallon batches and with less expensive equipment. Before we dive into HOW to brew beer at home, let’s review the ingredients that make beer and the equipment needed to make it all happen.
")
HOMEBREWING INGREDIENTS
Beer boils down to 4 essential ingredients:


MALT:

The main source of fermentable sugar in your homebrew is malted barley – typically just referred to as malt. When yeast is added to wort (unfermented beer, pronounced “wert”) they will convert these sugars into alcohol.


There are 2 main types of malt. Base malts are the main malts used as the foundation of your beer and the bulk of the fermentable sugars. Specialty malts include chocolate malts, smoked malts and more. Specialty malts have more impact on flavor, color and body of your beer than base malts. Flavors can range from biscuity, chocolatey, doughy, bready, toasted & more.
At Craft a Brew, our beer making kits use a combination specialty malts and high quality malted barley extract that is 100% natural with no additives. Using malt extract has several advantages over brewing with all-grain, the most important being time and convenience. The all-grain brewing process takes 3+ hours, while extract brewing takes about 90 minutes without compromising quality or taste.
")
Extract brewing is ideal for the new brewer learning the basic beer making process. Dry malt extract (DME) yields the same quality beer in less time and requires less equipment. We use Briess DME, which produces consistent beer, increases efficiency and can improve your homebrew’s head retention and mouthfeel.
If you’re a fan of malt-forward beers, we’d recommend starting with a maltier beer making kit:
")
-
-
- Oktoberfest Home Beer Brewing Kit – malt-forward, lightly hopped and drinks crisp. Read our post “How to use our Oktoberfest beer brewing kit” HERE.
-
-
-
- Brown Ale Home Beer Brewing Kit – features a blend of caramel malts, chocolate malts & dark Belgian malts.
-
ADJUNCTS:
Similar to malt, adjuncts provide alternative or additional fermentable sugar. Adjuncts can help produce higher alcohol beers, while some commercial breweries use adjuncts like corn or rice to produce cheaper beer.
Homebrewers can get creative with adjuncts that not only boost ABV, but add more flavor and complexity to beer. Corn Sugar (Dextrose) helps add clean, flavorless sugar for increased ABV. Belgian Candi Sugar adds color and distinct toffee & raisin notes. Oats contribute to a creamy mouthfeel and slight haze.

Adjuncts are also useful when brewing gluten free beer. Instead of malted barley, gluten free alternatives like sorghum extract are used.
If you want to try brewing with adjuncts, we’d recommend starting with one of these beer making kits:
")
-
-
- Gluten Free Amber Ale Home Beer Brewing Kit – instead of malt and grains, this beer uses sorghum extract & Belgian Candi Sugar.
- Sixpoint Resin IIPA (Sixpoint Brewery) Home Beer Brewing Kit – includes corn sugar (& extra yeast) to achieve a robust 9.1% ABV.
-
-
-
- Funky BUddha Chant IPA Home Beer Brewing Kit – includes corn sugar & amylase enzyme, which work together to create a low-ABV and low-calorie beer
-
HOPS:

Even if you know very little about the beer brewing process, you probably know a little about hops. Craft beer drinkers are obsessed with them!

Hops help balance your beer by offering a contrast to sweet, bready malts. The bitter acids and oils in hops balance the flavor profile and add aromatics. Without them, your brew would be TOO sweet. Hops are grown & bred all over the world and come in many varieties, each with distinct characteristics. They can range from piney, fruity, citrus-y, grassy, herbal or spicy. Hops can be used in their full cone form or as pellets, which look a bit like rabbit food. Hops are most commonly used in pellet form because they’re more stable, potent and efficient.

")
Hops also act as a natural preservative, which is how IPAs (India Pale Ales) got their name. Hops were used in high concentrations to help beer survive the long voyage from Britain to India.Hops are most notably used for their bitterness, which comes from the alpha acids inside the hop cone. The higher the alpha acids in a particular hop, the higher their bittering potential. But hops aren’t JUST used for bitterness.Hops also contribute to the flavor and aroma of your homebrew. If you’ve tasted a “juicy” or “hazy” New Englnd style IPA, you’ve experienced the softer side of hops. To extract more flavor or aromatics from hops they are used late in the boil or sometimes aren’t boiled at all.
DRY HOPPING – adding hops to already-fermenting beer to bypass bitterness and draw out hop flavor & aroma
If you want to try dry hopping your homebrew, we’d recommend starting with one of these beer making kits:
")
-
-
- New England IPA Home Beer Brewing Kit – all hops are added strictly post-boil for a juicy, hazy brew.
- Hoppy Wheat Home Beer Brewing Kit – an unfiltered wheat base is complemented by tropical hops added on brew day & dry hops added during fermentation.
-
YEAST:

Yeast is a living organism that’s technically a fungus. It grows and multiplies by “eating” sugars from malt, converting sugar into alcohol during fermentation. Yeast will also help carbonate your beer in bottles by releasing CO2.
")
Different strains of yeast will lend different character to your homebrewed beer. Some yeast will produce fruity flavors or spicy notes – like Hefeweizen yeast, which is known for its signature banana & clove esters. Some yeast will ferment super clean while some remain in suspension for hazy, unfiltered beer.
Each yeast strain has a different tolerance to the alcohol that it creates. Eventually yeast will die in the presence of alcohol, which stops the fermentation process. This is why beer alcohol levels aren’t as high as liquor and spirits. The strongest a beer can naturally get is about 20% ABV, which is not easily achieved.
The 2 main types of beer – ales & lagers – are defined by the type of yeast used for fermentation. All of Craft a Brew’s beer making kits are ales and use a variety of ale yeasts or “top fermenting yeasts,” which can ferment at room temperatures. Ales include IPAs, Hefeweizens, Brown Ales, Stouts, Reds & more.
Lagers, which use “bottom fermenting yeasts,” include Pilsners, Lite Lagers & Marzens. Lager yeast requires extremely strict & near-freezing fermentation temperatures. This can be difficult to achieve at the homebrew level, which is why most lagers are produced by large commercial breweries with sophisticated technology.
If you want to brew with interesting yeast strains, we’d recommend starting with one of these beer making kits:

-
-
- Hefeweizen Home Beer Brewing Kit – uses yeast specifically for wheat beer fermentation, which produces signature banana & clove notes. It’s a “low flocculating” strain, which means it remains suspended in beer for a hazier appearance.
-
-
-
- Golden Strong Ale Home Beer Brewing Kit – uses a specialty Belgian yeast strain that gives beer fruity aromas and spicy character. It’s a “high attenuating” strain, which means it leaves less residual sugar behind after fermenting for a drier finish & higher ABV.
-
WATER:

Plain old H2O is the main ingredient in beer. Any imperfections in water will be present in your finished homebrew. Generally, if your water is safe to drink then it is suitable for brewing. If you’re not sure about the quality of your tap water, it’s best to filter it (through a Brita filter, for instance) or to buy spring water. It’s not advised to use distilled water, because it’s stripped of minerals that actually aid in the fermentation process.
HOMEBREWING EQUIPMENT:
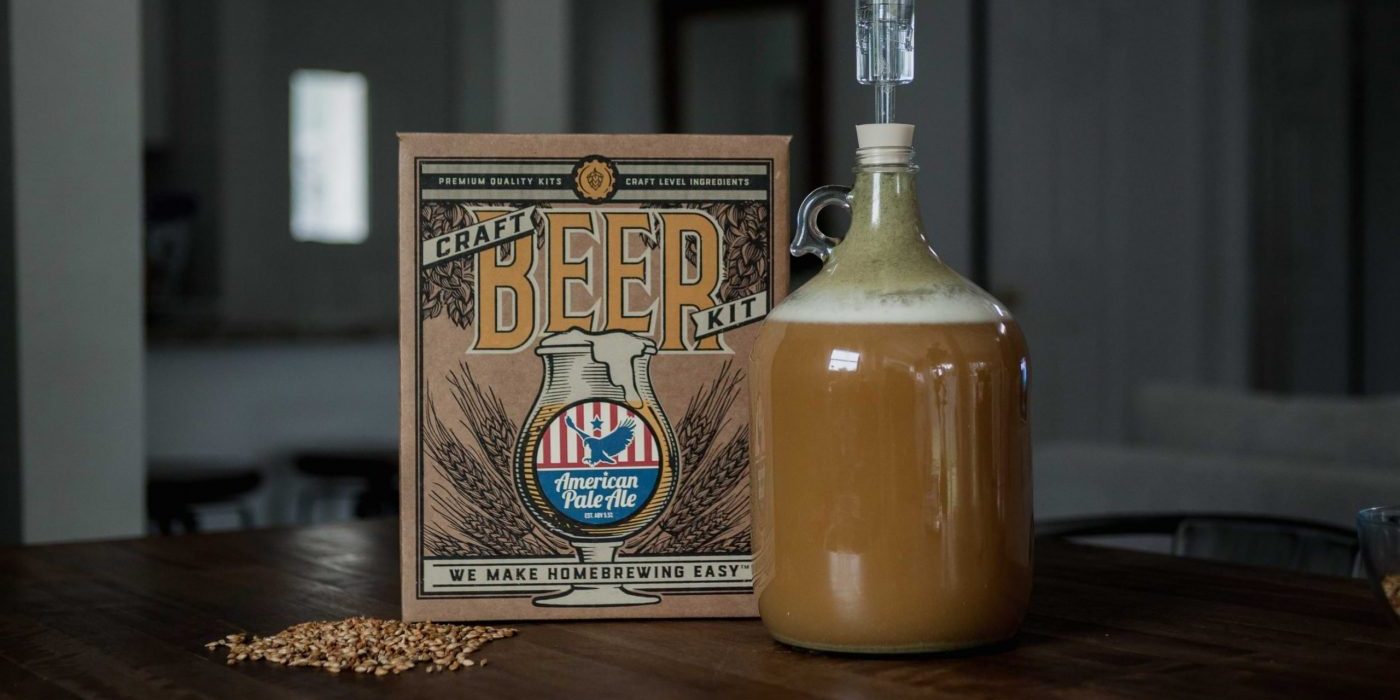
Once you have your ingredients, you’ll need a few essential tools to brew beer at home. You likely have some of these items already! For everything else, there’s our 1 gallon beer making kit, which equips you with all the essential equipment to brew and ferment your very first batch of beer. You don’t need a sophisticated set up to brew your own beer, you just need a few items to get your first beer started:
You may already have:
-
- Brew kettle (stock pot) – a 2 gallon volume is ideal for brewing 1 gallon batches
-
- Spoon
- Funnel
Items you will need to souce:
-
- A fermenter – this is where your beer ferments. Your fermenter can range from a humble carboy, a bucket or a more sophisticated conical fermenter. Read our post “What is a conical fermenter?” HERE.
- Airlock & stopper – a device that keeps oxygen out of your carboy, but lets CO2 – a natural byproduct of beer fermentation – release from the carboy.
- Racking cane & transfer tubing – used to transfer your beer without disturbing sediment that collects during the fermentation process.
- Thermometer – used on brew day to ensure temperatures are precise. Temperatures on brew day are crucial and must be properly monitored and maintained to ensure the best tasting brew.
- Sanitizer – our beer making kit includes powdered sanitizer to prepare your equipment for fermentation.
- Bottles – bottling is a crucial step in home craft beer brewing, as this is how your beer carbonates.
You can source these items separately, but to save yourself the time and the worry that you’ve forgotten something, we recommend starting with our 1 gallon beer making kit. To determine which of our kits is best for you, check out our blog post on “Choosing the best home brewing kit for you” HERE.
What’s in our kit?
-
- 1 gallon Glass Carboy
-
- Funnel
- Racking Cane, Transfer Tubing & Tube Clamp
- Rubber Stopper & Airlock
-
- Thermometer
- Guide to Craft Brewing
-
- Sanitizer
- Beer ingredients kit
")
How to brew your own beer:
BREWING
1. Pour as close to a gallon (3.8 L) of water in your brew pot as you can, but leave at least a few inches of room to prevent boil overs. Place your pot on the burner and turn up to high.
2. Place your specialty grains in the grain steeping bag and tie off the top in a knot. Wait until your pot of water reaches 155°F (68°C) and then steep the grains in the water for 20 minutes while closely maintaining the temperature.
")
3. Remove and discard the grains making sure NOT to squeeze the excess water from the grains (this will release unwanted tannins). Next, bring your wort (unfermented beer) up to a boil. Once you see the first boiling bubble take your brew pot off the burner.
4. Next, take out your malt extract and slowly stir it into the pot, making sure it does not clump or stick to the bottom. Once all of the malt extract is completely dissolved return the pot to the burner and turn the heat up to medium-high.
")
5. At this point you should be monitoring your brew pot at all times because the wort can easily boil over and this can be a very messy mistake! If you start to have a boil over, turn off the heat and blow on the foam (this will decrease the foam).
Bring the wort up to a slow rolling boil. Once this is achieved, stir in your bittering hops and start timing for a 60-minute boil. If your kit includes flavoring hops add them at 15 minutes left in the boil. Any aroma hops should be added with 2 minutes left in the boil. Each beer style’s hop additions will vary.
")
")
6. After the 60 minute boil, shut off your stove and take the brew pot off the burner. Next, create an ice bath in your sink using a few pounds of ice and cool water then place your brew pot in the ice bath. This is done to cool the wort to prepare it for the yeast, which must be added below 75°F (23°C). Place a lid on the pot while cooling to prevent contamination. The quicker you cool it down, the lower the risk of contamination, so use a lot of ice if possible.
")
7. At this time you should sanitize your glass carboy, rubber stopper, thermometer, tubing, strainer and funnel. Mix half of the sanitizer packet (save the rest for bottling) in a bucket or large pitcher with a gallon (3.8L) of warm water and mix thoroughly. Sanitize your equipment by letting it soak for 60 seconds in the solution. Place on fresh paper towels to dry.

8. Verify that the wort is below 75°F (23°C) with the sanitized thermometer. Take out your sanitized carboy and funnel and transfer the wort into the carboy, leaving any thick sludge in the pot. If you have a fine mesh strainer pour the wort through this in order to separate the spent hops from the wort.
")
9. If you don’t have a full gallon of wort after brewing you will need to add cool water as needed to just below the “one gallon” fill line. Cut open your included packet of yeast and add the contents to your now-filled carboy.
")
10. Take your sanitized rubber stopper and plug up the top. The stopper will naturally stick out a bit. Now you need to make sure the yeast has oxygen to multiply so you will need to aerate the wort. Take your clean thumb and place it over the top of the rubber stopper hole. Shake the carboy vigorously for over a minute. Once your wort is aerated you should avoid agitating or shaking your fermenter any further in order to avoid oxidation, which can yield off-flavors in your finished beer.
")
FERMENTATION
11. Now you need to make a blow off assembly to ensure the beer foam does not overflow when fermenting. Place the end of the flexible tubing about a 1/2 inch (12mm) into the hole of the rubber stopper and the other end into the bottom of a half full glass of water. Fermentation should begin within 24-48 hours and you will start to see bubbles of CO2. In a few days, once fermentation calms, fill your air lock half way with water and insert into the stopper.
12. Expect to see a lot of fermentation activity between 12-72 hours after adding the yeast. This will then slow dramatically for the remainder of the two weeks. Let your beer ferment for 2 weeks in a cool 60-75°F (15-23°C), dark place before bottling. Fermenting at too cold a temperature can delay or slow down the fermentation process.
BOTTLING
We recommend using swing top bottles, the same ones that Grolsch® beer is bottled in. You can sometimes ask for extras at a bar or just go buy two six-packs, empty (drink), and then use those. Another option is saving “pry off” bottles and using our capping kit. Try practicing siphoning with just water before you bottle to ensure no beer is accidentally spilled. Having a friend to help bottle your beer will make the job much easier.
1. Rinse bottles with warm water ensuring there is no sediment at the bottom.
2. Next you will sanitize your bottles, racking cane, tubing and a spoon for mixing. Mix the rest of your sanitizer in a bucket or large pitcher with one gallon (3.8L) of warm water. Soak all of the bottles and components in the solution for 60 seconds each to sanitize. Place everything on a fresh sheet of paper towels.
3. In a large pot (over a gallon) add about 1.5 cups (350mL) of water and exactly 2 Tablespoons (20mL) of table sugar. This sugar will give the remaining yeast fuel to carbonate your beer once bottled. Heat on medium-high and stir in the sugar until fully dissolved. Boil for 5 minutes then cover and let cool.
4. Once the pot and sugar water are completely cool it is now time to siphon the beer from your glass fermenter into this pot. This transfer ensures that the sugar properly mixes with your beer & helps leave sediment behind in the carboy. To do this, get a bowl of fresh, clean water; dunk your tubing into the water (with clamp open) and let the tubing completely fill with liquid. Next close the tubing clamp and attach the non-clamped end to the racking cane, this will be your siphon starter.

5. Insert the racking cane into the fermenter making sure the end is far enough away from the sediment at the bottom so as not to suck it up. Place the clamped end as low as you can and unclamp. This will start the flow of beer into your tubing. Use a glass to catch the water and clamp the tubing once the beer starts to freely flow out the end.
6. Transfer all of the beer into your pot with the now-cooled sugar water. Mix gently and thoroughly with a sanitized spoon.
7. Next, repeat steps 4-5 in order to start a siphon into the bottles. Fill the bottles slightly higher than where the neck starts, cap and repeat.
8. Store the bottles in a warm dark place for two weeks to let the beer condition and carbonate.
9. After 2 weeks at room temperature you can refrigerate, drink & enjoy!
Some beers will benefit from some extra aging. If there are any noticeable “off flavors” present then it is a good idea to let the beer age for another 1-2 weeks.