22 Mar How to make beer kit creations taste better: 10 tips for new brewers
How to make beer kit creations taste better:
10 tips for new brewers
A home brewing kit comes with everything you need to make your first batch of beer. And sure, a beer is only as good as its ingredients, but as the brewer you have a lot of influence on your finished product.
There are plenty of simple ways you can make your first homebrew the best it can possibly be. You don’t need to bury your nose in a book or invest in fancy equipment to improve the flavor, mouthfeel, clarity & carbonation of your homebrew. Just spending a few more minutes of your time preparing
The 1 gallon Craft a Brew beer kit features fresh, high quality ingredients to get you started on the right foot. Use one, or use all, of our 10 practical tips on how to make beer kit creations that taste like the pros. With a few practical techniques you can turn great ingredients into even greater beer on your very first try.
We’ve rounded up our top 10 simple tips that ANY brewer can easily implement – whether this is your first homebrew or your fifteenth.
1. Sanitize, sanitize, sanitize!
Ask any homebrewer or professional brewer how to make beer kits taste great and you’ll get the same answer. Proper and thorough sanitation is THE most important thing you can do to get the best flavors from your homebrew kit. It’s what separates an award winning beer from a beer that gets poured down the drain.
Skimp on sanitation and your precious homebrew could end up unsafe to drink. It could even be ripe with off flavors or aromas – think sulphur, corn, dirty socks, etc. Contamination from bad sanitation practices can also screw with your ABV (alcohol by volume). If foreign yeast or bacteria are present on your equipment it will compete with yeast to feast on all the fermentable sugars. That means less sugar for your brewers yeast and more fuel for the bacteria to skunk your batch.
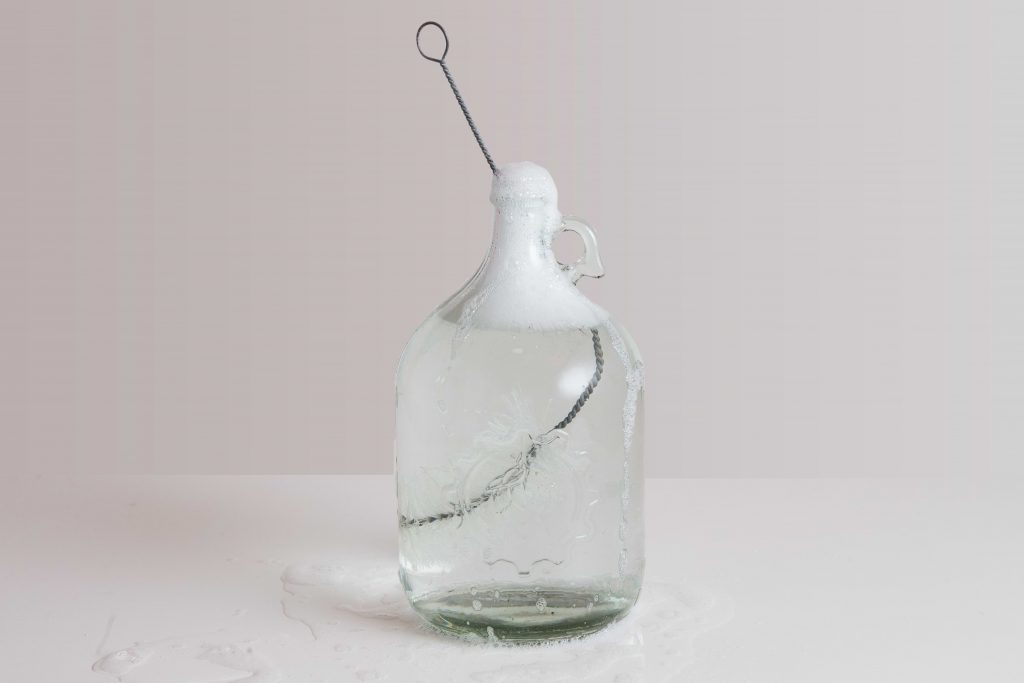
Every Craft a Brew beer kit includes a packet of sanitizer to help with this. Powdered one step, no rinse sanitizer is mixed with water to thoroughly sanitize your equipment for a squeaky clean fermentation. Everything gets a sudsy 60 second soak. Don’t fear the foam or bubbles – they are totally safe to come in contact with your beer.
After your first batch is bottled, be sure to give your equipment a good rinse and scrub to remove any stuck on sediment. Otherwise you may end up harboring bacteria that can contaminate your next batch. A carboy brush will be the best $4 you’ll ever spend. A bendable wire bristle brush will get all those hard to reach nooks and crannies.
Read up on sanitizing practices, tips & accessories in our “How To Clean Home Brew Kit Equipment” blog post.
2. Use the right water.
Your beer is mostly water – we’re talking 90% – 95% – it’s THE main ingredient. Any imperfections that are present in your water will come through in your finished product, so be sure to start with a solid foundation. Using good quality water is how to make beer kit creations taste the best they possibly can.
Generally, if your tap water is safe to drink it is safe to brew with. Using a filter or Brita pitcher is a great option to make sure your water is clean and safe to brew with. But if you want to give your beer the best possible chance, spring water is your best option. Pick up a gallon at the store and call it a day.
DO NOT use distilled water, as it is stipped of natural minerals which aid the yeast in fermentation.
You could fall down the rabbit hole of homebrewing water chemistry, but it’s not something you need to obsess over when using your first beer brewing kit. You’ve got plenty of other techniques and concepts to master before you begin tinkering with water chemistry.
3. Recruit the best pot for the job.
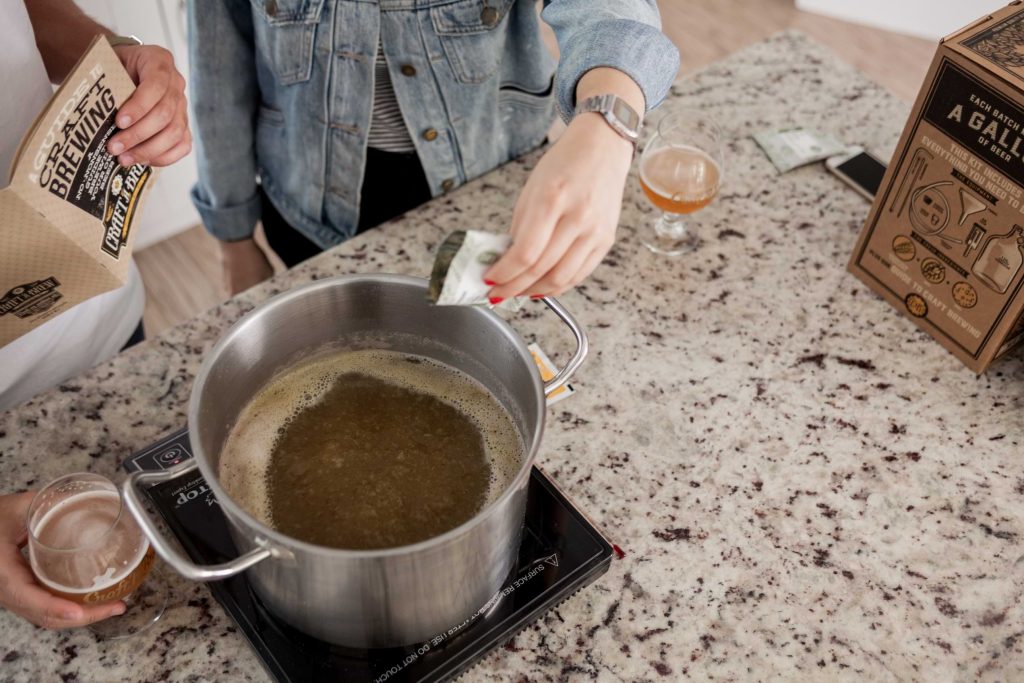
The Craft a Brew beer kit does not include a brew pot, because you already have what you need at home! You don’t need to go out and purchase a fancy brew kettle, however tempting that may be – a boring old stock pot works just fine. But you should choose your brew kettle like Goldilocks.
Use too large a brew pot and you may lose a lot of volume to evaporation, which can lead to problems with fermentation and carbonation. Use too small a pot and you’ll be dealing with sticky messy boil overs. Your ideal brew kettle is as close to 1 gallon as possible, while still allowing some headspace for boiling and foam.
You’ll also want to select a brew pot that has an accompanying lid. You won’t need it until you chill your fresh brewed wort (unfermented beer) to prepare if for the yeast. NEVER cover your brew pot with a lid during the boil – this can trap sulphur compounds in the wort, which taste like corn, cabbage, rubber or even fish in your beer. Keep that lid in a drawer until the ice bath. Brew day smells incredible, anyway!
4. Watch your brew pot like a hawk.
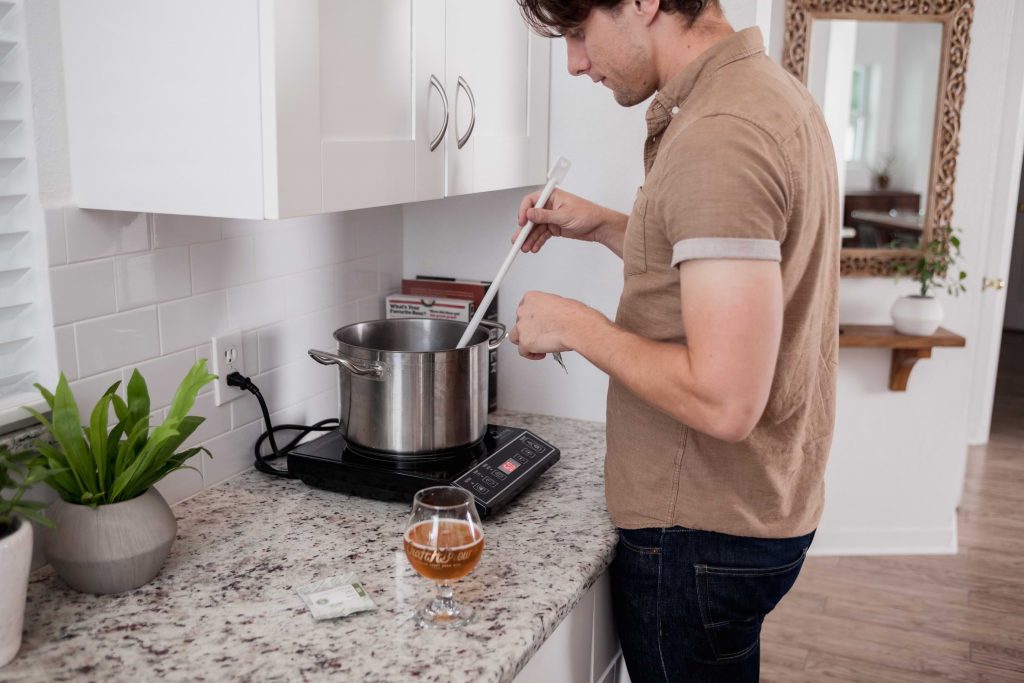
With an extract kit you’re only actively brewing beer for about 60 minutes, but a LOT happens that time. Don’t take your eyes off the pot or try to multitask on brew day.
An unwatched pot may boil over, causing a mess and resulting in lost volume. If you start to have a boil over you should immediately turn off the heat and blow on the foam before resuming. You can give yourself a leg up on foam with Fermcap-S (another $4 secret weapon). A few drops of this anti-foam agent can help keep boil overs at bay!
If you do end up losing volume on brew day, be sure to add cool water back to your fermenter to reach your full volume. Otherwise, you’ll be fermenting a super concentrate that will be super sweet and all but guarantee over-carbonated bottles.
Keep a watchful eye on your malt extract as you stir it into the boil, making sure nothing sticks to the bottom or clumps. Be aware of your brew day timer, too, as each hop addition has a strict & important “schedule” that determines the bitterness of your beer.
5. Improve clarity with sediment separation.
Sediment will naturally accumulate throughout fermentation, settling at the bottom of your fermenter. It is made up of spent hops, proteins from grains, dead yeast and other particulates.
The goal is to separate beer from this sediment for improved clarity (and flavor). To do so, you can employ a variety of techniques to keep cloudy sediment out of your beer glass. There are 3 simple techniques that you can use with your home brewing kit – try one or use them all. Here’s how to make beer kit brews clearer at a three points throughout the beer making process:
During the boil: Use a hop straining bag.

A nylon hop straining bag (yet another under-$5 game changer) will help keep hops contained during the boil. When you’re instructed to add them to your boil, tie them off in this bag to prevent the hop dust from escaping, ultimately keeping this added sediment out of your fermenter.
These clever little bags can also be used if you’re adding any dry hop additions or other adjuncts to your carboy (like cacao nibs, coffee beans or citrus peel) during fermentation. This way you can infuse your beer without dealing with the added sediment.
After the boil: Try the whirlpool technique.
This is an extremely easy (& free) way to keep hop sediment out of your fermenter. You’ll use this technique after chilling the wort, but before transferring to your fermenter.
The idea is to force sediment from brew day to the bottom of your pot with a vortex, which pulls it out of your wort. Once wort is chilled to 75 *F or below, remove your pot from its ice bath and place on a flat surface. Using a sanitized spoon, start to stir well enough to create a small whirlpool, but not so hard that you splash. Once you can see the whirlpool quickly remove your spoon mid-stir and cover the pot with a lid. Let the whirlpool run its course. After 10 minutes you should notice improved clarity and that most of the particles have settled at the bottom of the brew pot. Now you can gently pour the wort into your fermenter with a funnel, carefully leaving the sediment behind in the pot.
Before bottling: Cold crash.
After fermentation is finished, but before you bottle your beer, you can try a simple technique called cold crashing. This process not only improves the clarity of your beer, but it refines the mouthfeel and the flavor! If a crisp, clean finish is what you’re after (or what the beer style calls for) you should absolutely give this a try.
After fermentation place your carboy in the fridge (with the airlock on) for 3 – 5 days. During this time the residual yeast and sediment begin to drop out of suspension and settle at the bottom. Gently bring the carboy out of the fridge, gentle so as not to mix any sediment back into the beer. Now you can bottle your beer as usua! Look for noticeably improved calrity in your glass.
6. Use temperature control to keep yeast happy.
Temperature control is how to make beer kit yeast happy and how you get the best performance out of your hardest working ingredient. Yeast not only convert sugars into alcohol, they’re responsible for much of the flavor & aroma in your finished beer, too! Create an environment for them to thrive with a few simple temperature control methods.
The ale yeast strains included in each Craft a Brew beer kit can thrive in between 60 – 75 *F, with 68 *F being the sweet spot.
Too warm a fermentation temperature will accelerate fermentation and stress the yeast. This can result in exceedingly fruity, banana-y esters (which are desired in traditional Hefeweizens, but are considered an off-flavor in other beers). Avoid fermenting in a hot garage or shed.
Too low a fermentation temperature will slow down or stunt fermentation, making the yeast sluggish and slow. You certainly don’t want your yeast sleeping on the job! Avoid fermenting in chilly basements, especially on the concrete floors (they’ll often be colder than the ambient temperature in the room).
We suggest using a fermometer (another dirt cheap homebrewing accessory) to monitor fermentation temperatures. This adhesive thermometer strip indicates the fermentation temperature of the beer inside your fermenter so you can monitor how your beer is performing.
If the temperatures at home are outside of the 60 – 75 *F range try either of these simple methods to help your yeast thrive!
Chill out with a swamp cooler
If your house runs hot or you live in a warmer climate, build a simple swamp cooler for your carboy to keep temperatures in check. This technique does work best in dry climates – the dryer the air the more effective a swamp cooler will be.
First, scout a location in your house where the temperatures don’t fluctuate often. Find a large bucket, cooler or pot that can hold your carboy and some water.
Fill the container with 2 inches of water. Wrap the carboy in a hand towel or an old shirt and place in the water (make sure the towel touches the water). Position the entire setup in front of a fan. The fan blows the cloth, causing it to wick water and chill the beer! Voila!
Warm up with a heating pad or towel
If your house runs cold or is impacted by winter weather there are a few techniques for boosting fermentation temps. Wrap your carboy in a thick towel or blanket for insulation. Fermentation naturally generates some heat, which will be trapped by the towel to help to raise fermentation temperatures by roughly 5 *F.
Alternatively, you can place a heating pad underneath the carboy to increase fermentation temperatures. Use the lowest setting and make sure your carboy is completely dry and there are no signs of leaking.
A fermometer is an important tool to use if you do implement some sort of temperature control. You want to make sure you don’t accidentally stress your yeast with too much added heat.
7. Treat your fermenter like a vampire to avoid light strike.
Don’t fall victim to skunked beer! Whether in the fermenter or in bottles, your homebrewed beer should be kept away from light. “Light strike” can present as sulphuric, wet-dog or literal skunky character in finished beer. This off flavor is created when light-sensitive hop compounds are exposed to ultraviolet light.
It’s simple: keep your fermenting beer away from windows. If you can’t avoid it, cover the fermenter up with a towel or you can use the box that your brew kit was packaged in to protect it from light! The same goes for your bottles. While they carbonate at room temperature they should be kept out of sunlight. A simple tip: save the packaging from a case of store bought beer to stash your bottles while they carbonate.
Another easy tip for avoiding light strike: use dark beer bottles. Most beer you buy at the store comes in brown bottles or green bottles for this very reason. Craft a Brew’s Deluxe Bottling Kit includes ten 12oz brown beer bottles, a capping tool and bottle caps, but recycled pry-off beer bottles work just fine.
8. Protect your beer from oxidation.
Oxygen is your beer’s frenemy, so it’s important to note the differences between aeration (good) & oxidation (bad). Mistaking the two is how to make beer kit flavors go south (fast).
Aeration is crucial to your yeast’s success BEFORE fermentation. Wort is aerated by shaking vigorously for more than a minute when pitching the yeast. This helps create an oxygen-rich environment for yeast to thrive and multiply.
Oxidation occurs when bubbles are introduced to wort AFTER yeast begin fermentation – this can include sloshing, swirling, shaking or otherwise disturbing your fermenting beer OR not properly sealing your fermenter. Oxidation can create wet cardboard or sherry-like off-flavors. It can also leave your beer less stable, meaning it won’t stay fresh for very long.
Avoid oxidation by storing your fermenter in a location where it won’t be disturbed for the full 2 week fermentation. Even when adding dry hops or special ingredients (like coffee beans, oak chips or cacao nibs), do not stir them in or else you’ll introduce unwanted oxygen. Don’t worry, they’ll do their job even if they’re floating on the surface.
9. Practice siphoning well before bottling day.
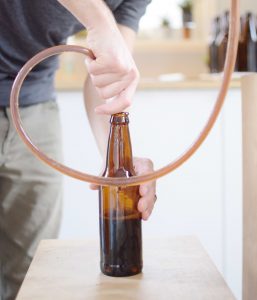
Not only will this shave time off bottling day, but it’ll help with tip #8 too. Siphoning may seem like a tedious process, but it’s important.
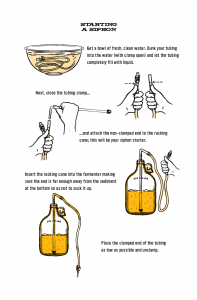
Your homebrew kit will likely include a racking cane & transfer tubing, which are used to perform siphon transfers. Siphons are used in homebrewing in order to splash your beer as little as possible when transferring beer out of your fermenter and into the bottles.
If you pour beer from one vessel to another, you’ll splash and create lots of unwanted oxygen bubbles. Not only that, but you’ll end up mixing the separated sediment back into your beer.
Performing a siphon is pretty simple, but every new brewer can benefit from a few practice runs before bottling day. Practice with water until you get the hang of it and bottling day will run a lot smoother! If you find that the process is too hard, you can source an auto siphon before it’s time to bottle OR recruit a second set of hands. A friend is always an asset on bottling day.
10. Start a brew journal to chart your progress.
Keeping a detailed log of all your brews can help you retrace your steps or determine what went right or wrong during the process. You can invest in a cool beer journal (THIS is one of our favorites) or just use a spiral notebook. You could also use our FREE beer tasting sheets to analyze your brews.
What should you jot down? Note the ingredients, the hop schedule, the equipment used, note the fermentation temperatures, any noticeable changes in appearance in the carboy, any special techniques or accessories used, and lastly, take detailed tasting notes once you’ve poured your first bottle. This provides a paper trail so you can assess what you’d change next time or what you’d definitely try again.
Be sure to note any off flavors that are present in your finished beer. They are another key to determining what may have happened on brew day or fermentation. Does the beer taste sulphuric? Rubbery? Sour? It all points to something you can fix the next time.
Let’s Recap!
There’s plenty you can do to get the best possible results from your beer brewing kit. With just a few more minutes of your time (or with an under-$5 accessory) you can take your beer to the next level and create something that tastes like your favorite craft brews!
- Don’t skimp on sanitation
- Start with good water
- Don’t use too large (or small) a pot
- Don’t multitask on brew day
- Separating sediment is key to clearer beer
- Implement some sort of temperature control
- Avoid oxygen & sunlight
- Practice siphoning (or recruit a buddy)
- Keep detailed notes


