19 Feb How to clean home brew kit equipment
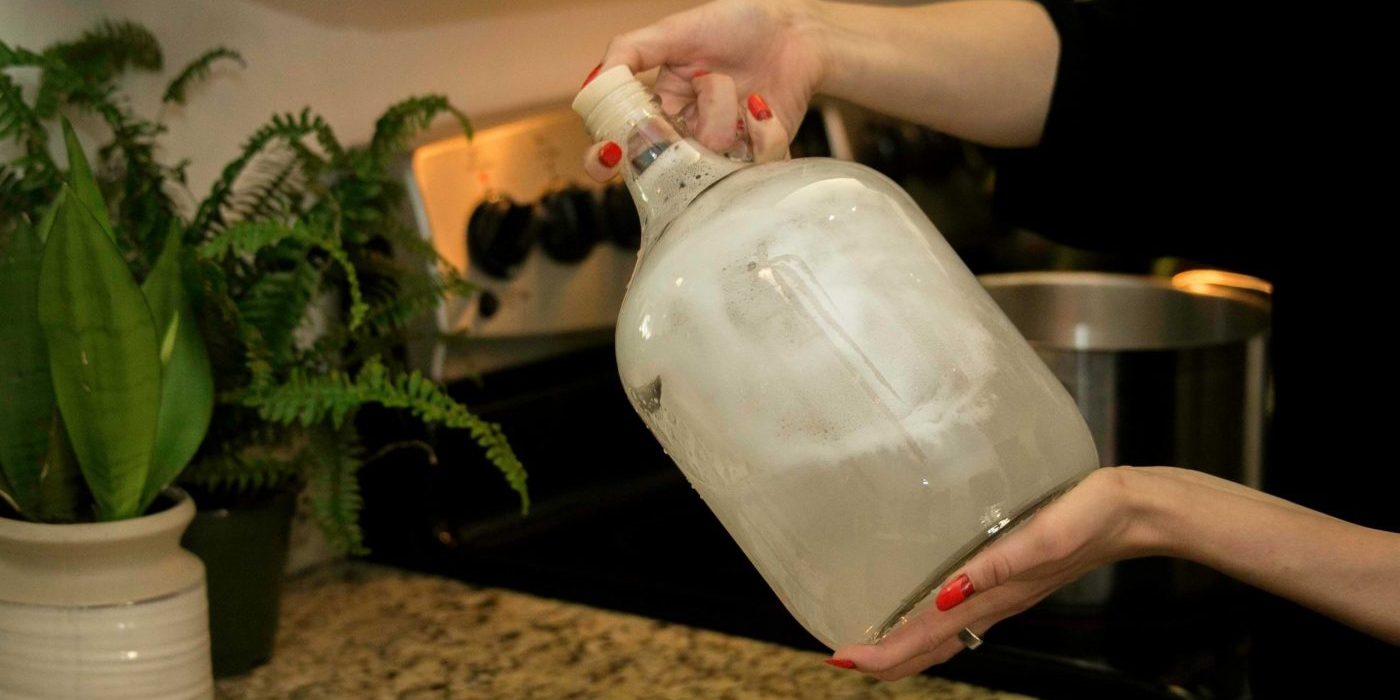
Sanitation is often regarded as the MOST important and most crucial step in the beer making process. If you’re new to brewing or are about to use your home brew kit for the first time, you’re probably curious about how to clean home brew kit equipment for the best results.
Proper sanitation is what separates your best homebrewed beers from brews so terrible that they get poured down the drain. It’s the simplest step you can take to brew the best possible tasting beers.
The last thing you want is to sink precious time and ingredients into brewing a beer only to be undermined by easily preventable contamination. This is one reason it’s wise to get your start with a homebrew starter kit like Craft a Brew’s 1 gallon Home Beer Brewing Kit, which includes sanitizer to get you started out right.
")
What happens when you don’t clean home brew kit equipment?
If you skimp on sanitation, many things can happen to your precious brew:
-
- Your beer could become unsafe to consume
- Aromatics change (skunked beer, sour smell, etc.)
- The target ABV can be reduced (or non-existent)
- Mild or intense off-flavors can develop
- Sulphur, creamed corn, cheese, dirty socks, damp, earthy, moldy or sour
Yeast should be the only organism touching your beer. If other bacteria are present, they’ll compete with yeast to feast on the fermentable sugars in your brew and spread quickly to make beer sour and undrinkable.
But what about sour beers?
You only want a beer to taste sour in your glass if you brewed a sour beer. But what if you want to brew a sour beer? Sours, like Craft a Brew’s Florida Weisse Home Beer Brewing Kit, are created by intentionally introducing pure Lactobacillus plantarum (lactic acid bacteria).

This bacteria consumes sugars in the wort (unfermented beer), resulting in tart & sour taste. This technique – called Kettle Souring – is done BEFORE yeast is introduced so the organisms don’t compete with one another in the fermenter. The result is an intentional sour finished product, controlled by the brewer in the pot so as not to contaminate homebrewing equipment.
Kettle Souring happens only in the brew kettle and never in the fermenter. This helps prevent bacterial contamination of your equipment – otherwise every beer you ferment in after a sour could end up sour, too.
Cleaning vs. Sanitizing
There is an important difference between cleaning and sanitizing your home brew kit equipment. Cleaning your beer-making equipment simply removes dirt or other visible surface-level gunk. Cleaning removes any material that could play host to bacteria or perpetuate its growth.Sanitizing, on the other hand, involves using a chemical solution to remove mold, wild bacteria & yeasts from your fermentation equipment.
Cleaning & sanitizing are both important, but very different. Cleaning is NOT a substitute for sanitizing. Cleaning should be done before sanitizing in order to remove any solids, dirt or dust. It’s best to clean your fermenter immediately after it is emptied to remove any sediment or biofilms before storing. Don’t let bacteria get cozy or make itself at home!
To best manage your time on brew day, you can sanitize your equipment once your beer is chilling in an ice bath in preparation for the yeast & for fermentation.
STEP 1
How to clean home brew kit equipment:
-
- Add a cleaning solution. (see “Cleaning & Sanitizing Solutions” below)
- Shake the fermenter to stir or agitate the solution.
- Let soak for a few minutes to loosen any caked on material.
- Use a non-abrasive cloth or sponge to clean if your fermenter is metal or plastic. An abrasive sponge or carboy brush is appropriate if your fermenter is glass.
- Soak any other items in the cleaning solution, including transfer tubing, airlock, rubber stopper, gaskets, etc.
- Rinse everything with cool water & allow to dry before storing.
STEP 2
how to sanitize home brew kit equipment:
-
- Once equipment’s been cleaned, it’s ready to sanitize. (see “Cleaning & Sanitizing Solutions” section below)
- Fill the fermenter with sanitizing solution per the instructions on the package.
- Seal the fermenter to give it a good shake to coat the surface area. At least a full minute of shaking.
- Sanitize other brew day & fermentation accessories in sanitizer for 60 seconds. (thermometer, funnel, airlock, transfer tubing, etc.)
- Let all equipment dry on fresh paper towels and discard sanitizing solution. NOTE: most homebrew sanitizers do not require a rinse, as they are safe to come in contact with your beer.
It is NOT advised to sanitize equipment using the dishwasher, boiling in water, the oven or bleach products. Remember: HEAT alone is not a sanitizing solution.
Cleaning & Sanitizing Solutions
Sanitizers come in many forms – powdered, oxygen based, acid based, etc. Often, sanitizer will be diluted in warm water & equipment should be soaked or submerged in the solution for 60 seconds in order to properly sanitize.
Most sanitizing solutions are perfectly safe to come in contact with your beer. While sanitizers are safe in trace amounts and usually don’t require rinsing, they should NEVER be poured into, mixed with or added directly to your wort (unfermented beer) in the fermenter or in the boil.
Here are a few of our favorite, tired & true solutions for cleaning & sanitizing:
One-Step – an oxygen-based sanitizer

A packet of this sanitizer is included with every Craft a Brew Kit. The powdered sanitizing solution is mixed with water to sanitizer fermentation equipment on brew day and bottles on bottling day. A 2 oz packet yields 2 gallons of sanitizing solution – 1 gallon for brew day & 1 gallon on bottling day.
Star San – an acid-based sanitizer

This is Craft a Brew’s favorite sanitizer – one bottle will last you for a long time. A ratio of 1 oz of StarSan per 5 gallons of water is used, so a bottle will last you for many batches of homebrew. Must come in contact with equipment for 1 minute for effective sanitation.
It foams up, but “don’t fear the foam.” It does NOT need to be rinsed off. Any foam left behind on your fermenter, bottles, etc. is non toxic and won’t impart any taste, odor or color to your beer. Because it is acid based, it’s advised to avoid skin contact to avoid any irritation.
PBW (Powdered Brewery Wash) – a non-caustic cleanser

PBW is a biodegradable alkaline cleaner designed specifically for your homebrew equipment – so it won’t stain or corrode your equipment. It’s safety use on metal, plastic or glass home brew equipment and skin-safe.
It helps remove caked on fermentation debris and rinses clean. This powdered cleanser is used & trusted by commercial breweries on their professional equipment. After a soak and rinse with PBW, your equipment is ready to sanitize.
Tools for cleaning home brew kit equipment
You might be wondering how to clean home brew kit equipment with hardened gunk. These cheap & time-saving tools will get your equipment squeaky clean without using too much elbow grease:

Carboys and beer bottles and their narrow openings are notoriously difficult to clean. One of the most useful tools to keep in your beer brewing arsenal is a carboy brush. A bendable wire handle makes this bristle-y brush easy to reach every nook & cranny of a carboy.
Loosen any stuck on krausen (a ring of heady foam that develops on the surface of your beer and inside the carboy during fermentation), dislodge any stubborn sediment and clean your beer bottles with confidence!

A spray bottle is another cheap, but revolutionary tool to keep in your homebrew line up. Larger fermenters (like buckets or The Catalyst Fermentation System) have much more surface area, making them trickier and much heavier to sanitize using the fill and shake method.
Instead, mix a solution of Star San and water in a spray bottle & spritz to cover the inside and outside of the fermenter. You’ll cover more surface area without having to lift anything.
Large Bucket, Bowl or Pitcher
There are multiple components that require sanitation – thermometer, funnel, beer bottles, etc. You’ll need something large to soak these in. A wide bowl, a big bucket or a pitcher are perfect for filling with sanitizing solution so you can submerge odd-shaped items like your brew paddle or your auto-siphon.
How to clean home brew kit equipment:
carboys & small fermenters

Every Craft a Brew Home Beer Brewing Kit includes a packet of one-step, no-rinse sanitizer. You’ll use HALF of this packet on brew day, saving the remaining half for bottling day equipment.
We suggest that you mix half the packet with a gallon of water in a large bucket, pitcher or pot. You can also pour the half packet directly into the carboy and fill with water the 1-gallon fill line. Give it a good shake to coat the interior for 1 full minute.

Then you can pour this sanitizing solution into a large bowl, bucket or pot and soak the rest of your brew day & fermentation equipment for 60 seconds:
-
- Funnel
- Flexible tubing
- Rubber stopper
- Airlock
Be sure to keep fresh paper towels handy so you can let the equipment dry on them. Remember, sanitizer doesn’t require a rinse.
How to clean home brew kit equipment:
The Catalyst & large fermenters
")
For larger fermenters that can’t really be ‘submerged’ in sanitizing solution it’s best to work piece by piece. The Catalyst features a screw on butterfly valve, mason jar, lid, bottling funnel attachment and a few gaskets. You can submerge these smaller components in sanitizing solution.
If you purchase the 5 gallon New Brewer Starter Kit it will include a packet of no-rinse sanitizer. If not, StarSan is a fantastic sanitizer solution.
When sanitizing the Catalyst, like any other large fermenter, it will be tricky to cover every inch of surface area with sanitizing solution. You can fill the tank with water & sanitizing solution and rock the tank back and forth, sloshing the sanitizer around for a full minute. For a more streamlined method, mix Star San in a spray bottle and apply all over for full coverage with much less effort.
 (1)")
When fermenting with The Catalyst, be sure to sanitize your mason jars before attaching them to the fermenter. A spray bottle of sanitizer comes in handy here, too! Spritz to soak the valve threads whenever they’re exposed after removing a mason jar of trub.
You’ll need to keep in mind how to clean home brew kit equipment that is plastic. Avoid abrasive sponges or brushes at all costs, as they can create abrasions or scratches where bacteria can hide and thrive. If you need to remove and caked on sediment, use the soft side of a sponge or a soft towel.
You can also clean the Catalyst’s tank in the dishwasher to avoid scratching the material. Remove your dishwasher’s top rack and place the tank upside down on the bottom rack. Do NOT force the tank to fit between prongs and make sure the tank does not touch the heating element.
Not all parts of the Catalyst are dishwasher safe like the tank. No other pieces should be run through your dishwasher, including the butterfly valve, lid, stand and silicone gaskets.
")
Remember, a cycle through the dishwasher is NOT a sufficient sanitizing method. The dishwasher can help dislodge any stuck on sediment using a regular cycle with the dry option on. Avoid high heat cycles.
How to clean home brew kit equipment:
beer bottles

Just like fermentation equipment, your bottling equipment needs thorough sanitation before you bottle & carbonate your homebrew to prevent off flavors or contamination at this stage.
If you have a Craft a Brew home brew kit, you’ll have the necessary sanitizer needed for this step. Mix half of the sanitizer packet with 1 gallon of water. You can mix this in a large bowl, bucket, pitcher or pot. It’s ideal if the entire bottle can be submerged.
Each bottle and bottle cap needs 60 seconds of soaking. You can use fresh paper towels to let the bottles dry upside down.
You can reuse pry off beer bottles from a 6-pack to bottle your homebrew. Just be sure to give them a rinse as soon as you’ve finished the beer to remove any sediment right away.
How to clean home brew kit items:
Frequently Asked Questions
At this point you may be wondering, what ELSE needs to be sanitized? Let’s cover some of our most frequently asked questions about how to clean home brew kit accessories & ingredients:
Do I need to sanitize my ingredients, too?!
Don’t worry, you don’t have to dunk everything in a sanitizing solution. Anything being added to the boil (hops, grains, dry malt extract) is safe to add without sanitizing. In fact, the boil does a great job of sanitizing those items for you.
If you’re ever looking to add ingredients to any of our homebrew kits, we recommend doing so at the end of the boil.
For example, if you’d like to add fruit to your beer, it’s a good idea to do so during the boil. You can add it in the last 2 – 5 minutes left in the boil. This sanitizes the fruit, which can harbor foreign yeasts or little organisms on the skins, while preserving much of the flavor, aroma and color.
If you want to brew with fruit or other ingredients, Craft a Brew has a variety of beer making kits to help you learn:
Includes sweet orange peel utilized on brew day, but can be perked up with more citrus peel or zest of your own. Try adding lime, lemon or grapefruit!

An optional addition of local honey is used on brew day to soften hop bitterness.

Another way to sanitize homebrew adjuncts – like coffee beans, spices, herbs, cacao nibs or oak chips – without subjecting them to the boil is to create a tincture. Soaking your ingredients in a neutral spirit not only sanitizes them, but it helps extract more concentrated flavor from a small amount of any ingredient.
For example, vanilla beans are very expensive, but make a delicious addition to stouts. You can stretch one vanilla bean by soaking it in a small amount of vodka for 12 – 72 hours before straining out the bean. Store the liquid in an airtight container until mixing with your priming sugar on bottling day.
Do I need to sanitize my dry hop additions?
Hops actually do a pretty good job of combating bacteria on their own. In fact, IPAs (India Pale Ales) got their name from the English Pale Ales that were sent to India. These beers were highly hopped to preserve them on their long overseas journey.
With that said, if you plan to add hops using a hop straining bag (rather than directly into the fermenter), it IS advised that you sanitize the hop straining bag. This is another argument for keeping a spray bottle of StarSanhandy. Instead of breaking into a packet of one-step sanitizer or mixing a solution every time you need to quickly sanitize something, you can just reach for your trusty spray bottle!
WHAT’S NEXT: How To Use A Beer Making Kit – Homebrewing 101