
10 Aug Home Beer Brewing Kit Instructions: How To Brew With Fruit
Home Beer Brewing Kit Instructions
Step 1: Consider the beer style
Before choosing fruit you should consider the base beer and ingredients. The goal is to complement (or contrast) the beer’s natural character, allowing the fruit to shine without overpowering the base beer.
Natural flavors of the grains, hops & the yeast strain in your particular beer kit can inspire fruit pairing ideas. Here are some examples:
- Amplify citrus-y hops with citrus fruit, like grapefruit-y Cascade, lemon-y Simcoe or Tangerine-like Summit.


- Belgian Ales use raisin-y malts & spicy, earthy yeast. Lean into those flavors with actual raisins, dark fruits or spice additions.


NOTHING is off limits when you’re brewing your own beer – that’s the beauty of making it yourself! But some beer styles are simply better suited for fruit. Remember, just because you can add fruit doesn’t mean you should. Let the style call the shots!
If you’re looking for beer kits designed to be brewed with fruit, Craft a Brew has 2 kits to get you started:
- Orange Golden Ale – includes dried orange peel. Feel free to add to the fruit profile with fresh citrus zest!

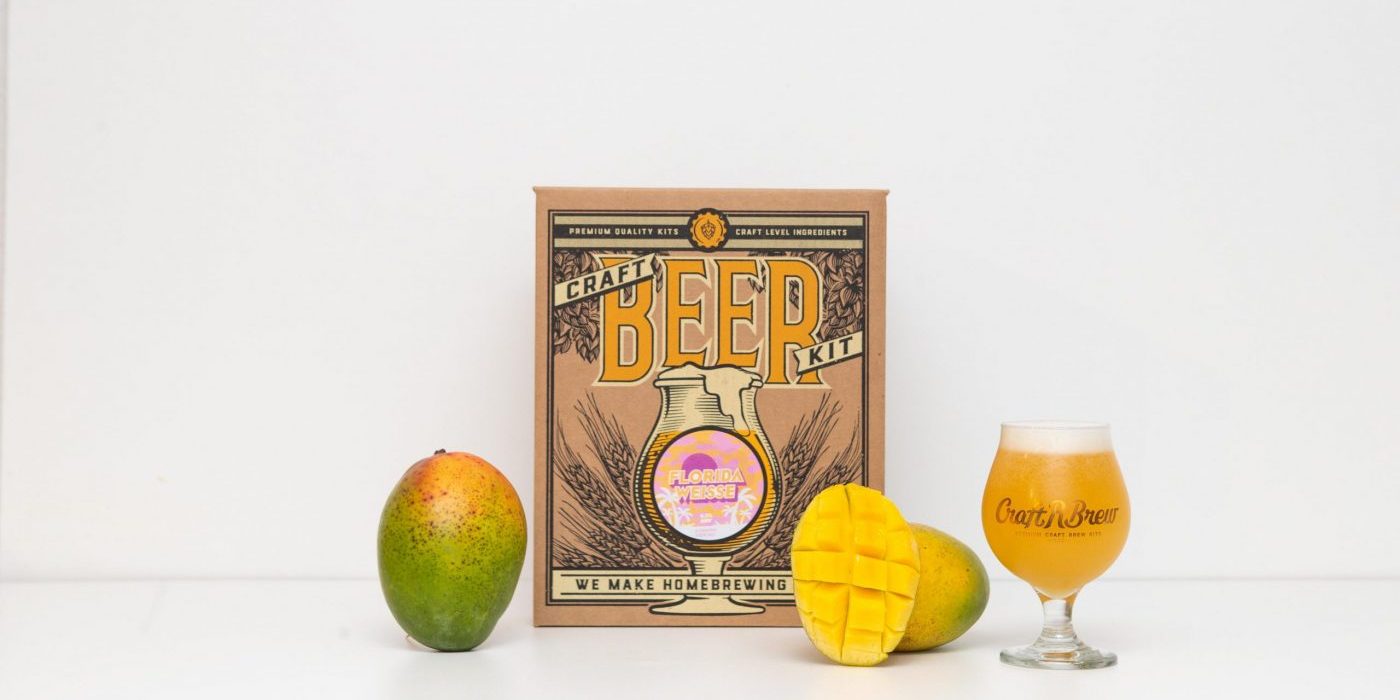
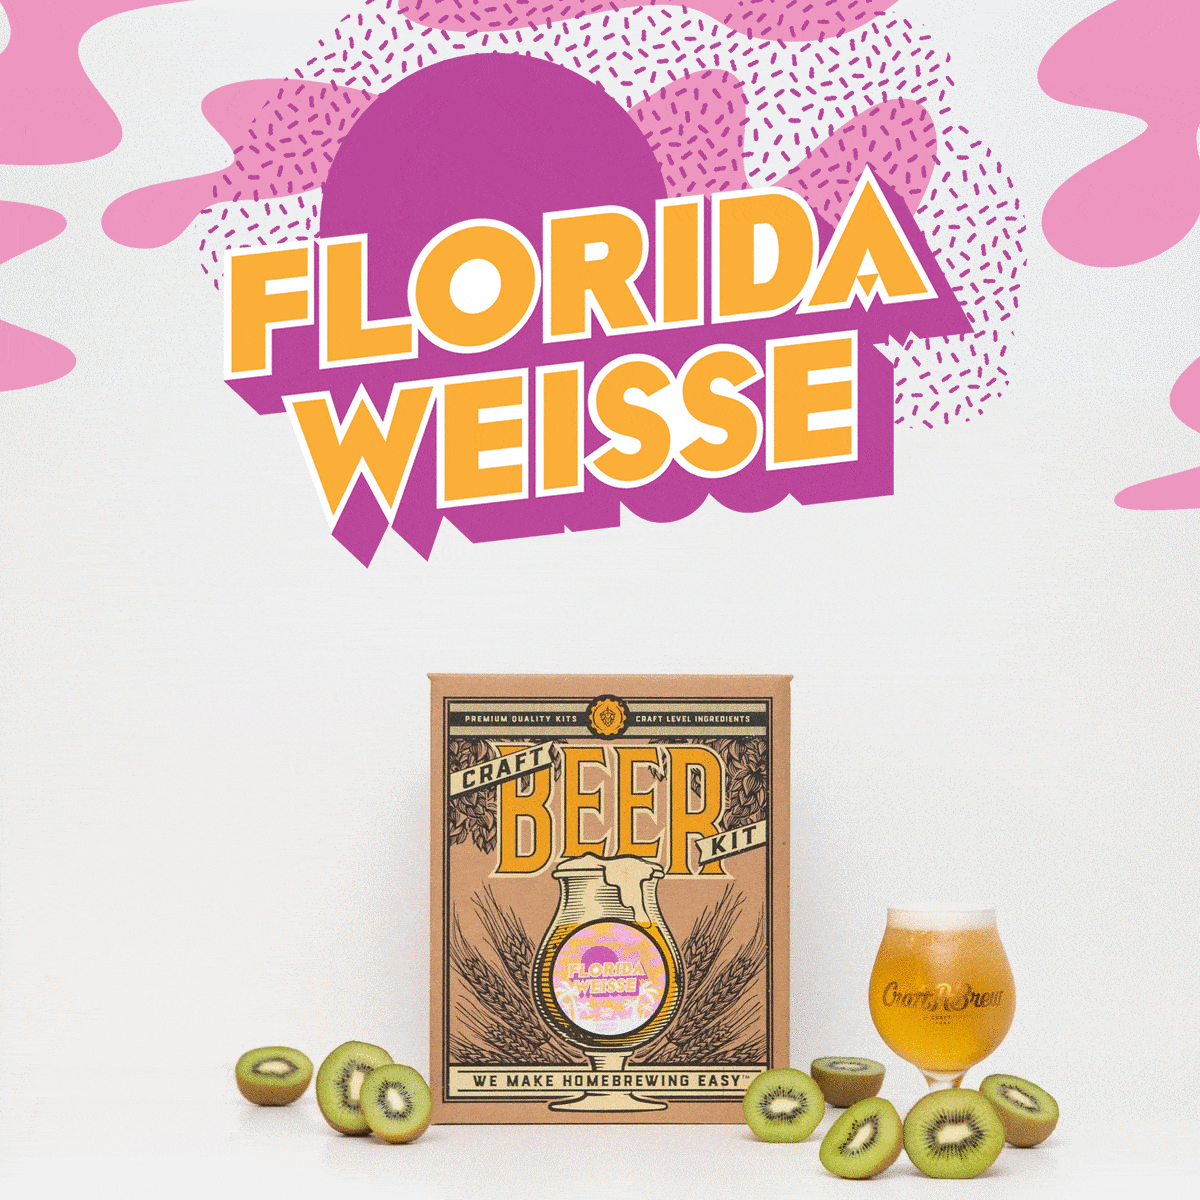
- Florida Weisse – includes detailed home beer brewing kit instructions that teach you how to kettle sour & brew with tropical fruit. Fruit not included.

IPAs
When selecting an IPA for fruit additions, opt for one that’s gently hopped & not aggressively bitter.
Look to the IBUs (international bitterness unit) to determine whether an IPA is a good fit for fruit. A NEIPA clocks in at 40 IBU, while Craft a Brew x Sixpoint Brewery’s Resin IIPA reaches 103 IBU. Aim for a kit with ~40 IBU or less to prevent fruit flavor from being overshadowed by bitter hop oils.
We recommend:
Craft a Brew’s New England IPA – perfect for citrus peel or zest additions because it uses Citra, Simcoe & Mosaic hops (all oozing with citrus flavor).

Wheat Beers & Golden Ales
These lighter ales make fantastic bases for fruit additions due to their light, refreshing flavor. Even subtle fruit can still shine through in the finished product (like blueberries or watermelon). The pale finish let’s fruit color shine through.We recommend:
- Craft a Brew’s Hefeweizen – The gentle tang from the wheat base complements tart raspberries or passion fruit.
- Craft a Brew’s Hoppy Wheat – tropical fruit-forward hops are well-suited for citrus, melon or pineapple.
Sour Beers
Fruity sours have taken the craft beer scene by storm & it’s no wonder why. The tart finish from kettle souring (learn more in our sour beer blog post) begs to be paired with fruit. Try guava, mango, lime or raspberries.
We recommend:
-
-
- Craft a Brew’s Florida Weisse – this kit includes step-by-step instructions for kettle souring & brewing with fruit – choose-your-own-adventure!
-
Belgian Beers
Stone fruit, peaches, apricots & raisins work really well in high ABV Belgian beers or strong ales. Belgians have complex, sweet & boozy flavors that could play nicely with currants, plums or dates.
We recommend:
-
-
- Craft a Brew’s Golden Strong Ale – Use dark fruit, currants, figs or even spices to enhance the natural esters from the yeast.
-
Stouts & Porters
Subtle flavors can be overshadowed by dark malts, so be sure to use assertive fruit, like coconut, or acidic flavors like tart cherries, which provide contrast to the rich, roasty malts.When pairing fruit & stouts, a 3rd component can help bridge the gap between dark malts and acidic fruit. Experiment with cacao nibs, non-fermentable lactose, warming spices, roasty coffee or bourbon barrel pieces to elevate fruity stouts. (More on tinctures later).
We recommend:
-
-
- Craft a Brew’s Chocolate Milk Stout – this kit includes lactose & cacao nibs. Consider adding strawberries for a neapolitan ice cream inspired stout or add a chili pepper & a cinnamon stick for Mexican hot chocolate vibes. (Yep, peppers are fruit!)
-

Home Beer Brewing Kit Instructions
Consider the form of fruit
Fruit comes in many forms: fresh, whole, frozen, puree, juice, zest, dried, candied, etc. The type of fruit (& volume) you should use depends on the technique & your desired flavor. Regardless of the form, be sure to use only 100% fruit. Preservatives or additives can interfere with fermentation.
- Fresh, whole fruit is ideal. But if the fruit is out of season, frozen works great. It’s frozen at peak ripeness & is often already chopped for you.
- Fruit should be chopped, grated, pureed or juiced to maximize surface area. If working with complicated fruit (a whole coconut, a large pumpkin or a slimy, seedy passion fruit) opt for shredded, pureed or juiced varieties to save time.
- If the fruit is hard-to-find, opt for juice instead – as long as it is 100% fruit. Think cranberry, pomegranate or black cherry.
- Bottled puree works if you can’t find it fresh. Blood orange, banana or guava. Amoretti is a great resource for ready to use fruit purees. The supermarket also has amazing selections of fruit nectar (guava, papaya, tamarind).

A note on citrus
Citrus flesh & juice are NOT ideal for fermentation. If you want citrus flavor you should only use the zest or the peel (fresh or dried are fine). The bitter white pith should also be avoided. Be warned: fermented citrus tastes & smells horrendous. This is why you should avoid using citrus flesh or juice in the boil or fermenter. Trust us – stick with the peel.
How & when to add fruit – 3 techniques
There are 3 points throughout the beer making process where you can add fruit:
- On brew day
- During fermentation
- On bottling day
Depending on your desired flavor, the best technique for the task will vary. The form of the fruit will also dictate the technique.
You can use a combination of 2 or more of these techniques on the same beer (for example: add raspberries on brew day & a lime peel tincture at bottling for layered flavors).
Method 1: Add to the boil
This is our most trusted technique for adding fruit to a beer kit. We recommend fresh, whole fruit, but frozen, juice, or bottled puree work as well. Citrus zest or citrus peel can be added this way, too.
If adding fruit on brew day you will need to reduce your water volume accordingly so you have enough room in your fermenter. We recommend using 0.5 – 1 Lb of fruit puree per gallon of beer. Adjustments aren’t necessary if only adding zest or peel.
You should remove the peels, rind, pit, seeds, leaves or stems if applicable. (You don’t need to peel blueberries or pick seeds off strawberries). Puree the fruit in a blender to increase the surface area for maximum contact.
Add the fruit puree (or zest / peel) to your brew kettle with 2 minutes remaining in the 60 minute boil. A nylon straining bag will help keep pulp out of your fermenter.
This method sanitizes the fruit, killing any wild yeast. The timing also helps retain much of the fruit aroma and color. Adding fruit any earlier would boil off much of its character.
This technique is best suited for stronger fruit flavors, since fruit character can boil-off on brew day. Subtle melon or prickly pear may not be ideal for this method.
Method 2: Add during secondary fermentation
If cooked fruit flavors are not what you’re looking for, you can add fruit to the fermenter instead. This technique is implemented when a beer’s initial, active fermentation is complete – generally after 5 – 7 days.
During the first week of fermentation, yeast is hard at work converting sugars into alcohol and CO2. If fruit were added at the beginning of fermentation, much of its flavor would escape through the airlock. Waiting until fermentation is nearly complete helps retain much of the fruit’s natural character.
You can use diced fruit, frozen fruit, bottled puree, or fruit juice at this step. If you plan to use a lot of fruit at this step be sure to reduce your volume on brew day so there is room in your fermenter. Your goal is to reach just over 1 gallon (or 5) after the fruit is added.
Prepare fruit by washing (if using fresh fruit), peeling and de-stemming. Then puree or dice to increase the surface area. After 5 – 7 days of fermentation, add about 1 cup (per gallon) of puree, juice or diced fruit directly to your fermenter.
Remember – fruit contains fermentable sugar. So you will notice renewed fermentation activity after adding it. Allow the yeast ample time to completely ferment before bottling. Make sure your beer is ready to bottle by:
- Waiting until airlock activity & bubbles have completely stopped for 2 full days.
- Taking a gravity reading with a hydrometer. With this tool, samples of beer – one taken on brew day and another on bottling day – are compared to calculate ABV (alcohol by volume). If your fruit beer’s ABV is very close to the listed ABV on the beer kit, this is an indicator that it’s safe to bottle. If not, allow the yeast some more time to work on the fermentable sugars.
Generally, fruit will require 7 – 10 days of contact for the flavors to completely infuse. You do need to wait until fermentation is complete before bottling. But know that the fruit flavors will reach a saturation point after ~1 week of aging – aging for weeks or months won’t make fruitier beer.
Adding fruit at this stage does pose more of a contamination threat (since all fruit usually carries wild yeast). After 5 – 7 days of fermentation, most beers are less susceptible to contaminants. To be extra safe and follow our home beer brewing kit instructions, you may choose to boil the fruit & let it cool before adding to the fermenter. Bottled purees or fruit juices come pre-sterilized.
Method 3: Add a tincture on bottling day

A tincture is a concentrated infusion made by soaking an ingredient in a neutral spirit to extract its flavor (think vodka or everclear, though a bourbon or rum may suit your recipe). The infusion is added to your fermented beer on bottling day.
This method is great for citrus zest or peel, dried fruit or fresh herbs or spices – anything with oils worth extracting. Whole, fleshy fruits are not an ideal candidate for tinctures.
Tinctures help amplify flavors from an expensive ingredient (like a whole vanilla bean). They’re also great for dialing in powerful or unpredictable ingredients (like spicy chili peppers, mint leaves, candy canes, cinnamon sticks or even peanut butter).
While the 2 previous methods are more experimental by nature, tinctures give brewers much more control over the finished beer.
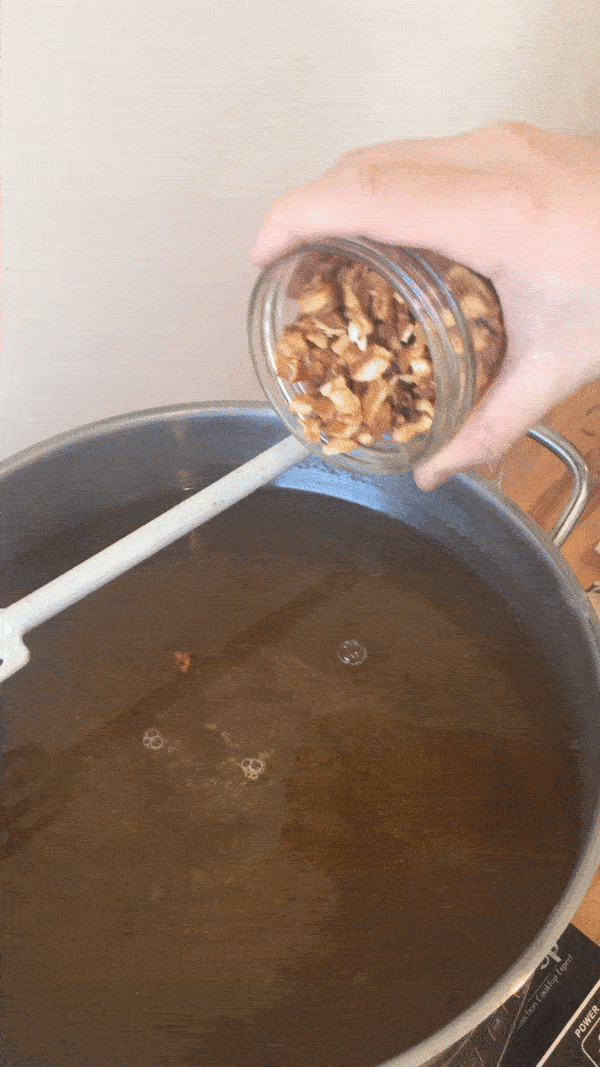
To make a tincture, place your ingredient in a mason jar. Pour just enough vodka into the jar to barely cover the ingredient. Let soak for 12 – 72 hours. The longer the soak, the stronger the flavor. This soak also sterilizes the ingredient. Once the desired flavor is achieved, strain & discard the solids. Cover the jar of liquid until bottling.
On bottling day you’ll add the tincture to your cooled priming sugar solution, stirring gently to combine. Then you’ll transfer your beer into this mixture before bottling to evenly distribute the flavor.
PRO TIP: Instead of adding the entire tincture to your priming sugar, try adding different volumes to each bottle. Dose one bottle with ½ tsp, another with 1 tsp, etc. Label the bottles accordingly. This allows you to try multiple flavor variations with a single batch of beer. Once carbonated, enjoy all the bottles in a “horizontal” tasting, where you sample all the variations in a single sitting to analyze the flavors.
How much fruit to use
Brewing with fruit is an ongoing experiment, but the results are always delicious. With so many variables (the fruit, its form, the timing, the base beer) there’s no one-size-fits-all answer for volume. But you can use our guidelines as a benchmark:
- 0.5 – 1 lb of fruit per gallon (when adding puree on brew day)
- 1 cup of puree, juice or diced fruit (when adding to the fermenter)
- Zest or peel of 1 fruit (when using citrus in any method)
Delicate, subtler fruits may require more volume to pack a punch, while stronger fruit may require less volume to shine in the finished beer.
Keep a journal & dial in your recipes
Get a simple notebook & take diligent notes. Fruit beers are an evolving experiment! To start, choose 1 fruit & 1 technique. Use this batch as your benchmark & take diligent notes in a brew journal to chart your results. Brew, taste, analyze repeat.
Note the timing, technique & volume of your fruit additions. Be just as diligent with your tasting notes and analysis. By logging what works (and what doesn’t) you can refine your recipe OR replicate it again and again. Don’t give up after one fruit beer. If you have your heart set on a mango IPA try using mango puree, mango nectar, brew the mango, ferment the mango. Try different IPA base beers, play with the volumes & the techniques until you nail it!
5 fruit beers: step by step home beer brewing kit instructions
Neon Raspberry Sour
Our kettle soured Florida Weisse comes with everything you need to brew your own fruity sour beer. While any fruit will work, we love using electric red raspberries for high voltage color.
What you need:
-
- Our Florida Weisse brew kit
- 1 lb of raspberries (per gallon) – you can substitute any tropical fruit here, like mango, guava, blueberries, kiwi, etc.
- Blender
How to make it:
-
- Brew your Florida Weisse per the included instruction sheet. When adding fruit to the boil, you’ll need to reduce your water volume accordingly.
- Due to the nature of this beer style, brew day is split up between 2 separate days. Brew day “part 1” prepares sugary wort for kettle souring. Wort will sour in the pot for 1 – 4 days.
- After reaching your desired sour flavor, resume brew day by beginning a 60 minute boil. Add hops at the beginning of the 60 minute boil
- Now, blend raspberries to make a puree. Add the fruit with 2 minutes left in the 60 minute boil.
- Continue to ferment and bottle your sour per the instructions!
Orange Cranberry Ale
Our Orange Golden Ale, which includes dried orange peel, gets a Thanksgiving cranberry sauce inspired makeover.
What you need:
- Our Orange Golden Ale beer kit (includes sweet dried orange peel)
- 1 cup of fresh or frozen cranberries (per gallon)
- Strainer
How to make it:
- Brew your Orange Golden Ale per the Guide to Craft Brewing. Sweet orange peel is added with 5 minutes left in the 60 minute boil.
- With 2 minutes left in the 60 minute boil, add the cranberries to the pot.
- Let the fruit sit with the wort (unfermented beer) as it chills in the ice bath.
- When transferring the wort into the fermenter, use a strainer to keep the fruit out. (If some fruit transfers into the fermenter this is okay.)
- Ferment for 2 weeks, then bottle as usual.
Peanut Butter & Jelly Brown Ale

Our classic Brown Ale ages on strawberry AND utilizes a tincture to create a nostalgic brown bagged brew.
What you need:
- Our Brown Ale beer kit
- 2 oz PB2 (powdered peanut butter)
- 1.5 oz Amoretti Wild Strawberry Puree (or ½ cup homemade strawberry puree)
- Vodka, everclear or other neural spirit
- Mason jar & lid
How to make it:
- Brew your Brown Ale per the Guide to Craft Brewing. This beer will ferment for 3 weeks so the beer can age on the ingredients and so the yeast can handle the added sugar from strawberries.
- After 2 weeks of fermentation, you’ll add your Strawberry Puree & PB2.
- Add the strawberry puree directly to the fermenter. (If making your own puree, you may want to boil it to sanitize. Let cool before adding to your carboy.)
- Before adding the PB2, mix the powder with just enough vodka to create a ‘slurry.’ This helps sanitize the ingredient and keeps the powder from clumping.
- Let the beer age on the strawberries & peanut butter for 1 more week before bottling.
Watermelon Wheat
Juicy watermelon plus our hazy Hefeweizen come together to make a refreshing summer brew.
What you need:
- Our Hefeweizen beer kit
- 1 cup of homemade watermelon puree or bottled juice (per gallon)
- Blender or juicer
How to make it:
- Brew your Hefewizen per the Guide to Craft Brewing.
- On day 5 of fermentation, prepare your watermelon. Puree, blend or juice the ripe meat of a watermelon. Strain it through a cheesecloth or fine mesh strainer to remove the pulp. Measure 1 cup (per gallon) and add directly to your fermenter.
- Continue fermenting as usual. Bottle as usual!
Chocolate-covered Coconut Macaroon Stout
Our Chocolate Milk Stout, complete with sweet lactose sugar and cacao nibs, gets a flavor boost from toasted coconut.
What you need:
- Our Chocolate Milk Stout beer kit
- 3.2 Oz unsweetened shredded coconut (per gallon)
- Cookie sheet & oven
How to make it:
- Brew your Chocolate Milk Stout per the Guide to Craft Brewing. Lactose is added on brew day with the Dry Malt Extract.
- This beer ferments for 3 total weeks to allow the beer to age on the cacao nibs & soak up that rich flavor.
- After 7 days of fermentation, cacao nibs are added to the fermenter.
- After 10 days of fermentation, prepare your coconut for the fermenter. Spread it out on a cookie sheet. Toast the coconut in your oven at 300 *F – just until it turns golden brown. **This can happen quite fast, so don’t leave it unattended. Let cool & add the toasted coconut to the carboy.
- Let the coconut age for 11 days before bottling.