30 Jul How to use home brew kit equipment to bottle your beer

Carbonation Basics
After fermentation beer will still be flat. Before your homebrew can be served & enjoyed it needs to undergo carbonation – a process also called ‘conditioning.’ During the conditioning phase a beer’s mouthfeel and flavors can be refined, improved & changed.
Yeast
During fermentation, yeast convert sugars from malted barley into alcohol and CO2, but the CO2 is allowed to escape through the airlock. During conditioning beer is sealed in bottles in order to trap CO2, forcing it into the beer.
Homebrewed beer essentially undergoes a second fermentation inside capped bottles. This is achieved by adding a precise amount of sugar to the fermented beer, which residual yeast will convert into CO2.
Priming Sugar
Without sugar, yeast doesn’t have fuel to create CO2. And because all the fermentable sugars in your beer have been converted into alcohol during fermentation, you’ll need to give your yeast a boost.
A priming solution (a precise volume of sugar + water) is added to fermented beer before transferring into bottles. Brewers use simple, neutral sugars for this task, like white table sugar (sucrose) or corn sugar (dextrose).
Temperature
Yeast require a specific temperature range during bottle conditioning in order to perform at their best (just like they do during fermentation). Too cold & the yeast will go dormant in bottles, leaving you with flat beer. Too hot & the yeast can become overactive or stressed, leaving you with over carbonated beer or even dreaded “bottle bombs.”
Time
Yeast requires time to convert priming sugar into fizzy carbonation inside your bottles. The general timeline for most bottle conditioned ales is 2 weeks, while some high ABV beers will benefit from 3, even 4 weeks of bottle conditioning.
Timing is one of the most crucial factors in bottling your homebrew. You should never bottle before beer has finished fermenting. Don’t leave bottles unattended at room temperature beyond the recommended conditioning timeline. Following our tips on how to use home brew kit equipment to bottle your beer will simplify the process and improve your results.
How to make sure your beer is ready to bottle
If you bottle a beer before it’s ready you might be in for a dangerous dilemma: bottle bombs (bottles that explode from overpressurization). Here are some tips for how to use home brew kit accessories to confirm when your beer’s ready to bottle:
-
- Is the airlock still bubbling? Your beer needs more time. This is a sign that the yeast is still fermenting. Wait until airlock activity has completely stopped for a full 2-3 days before bottling. Note that even if your beer’s been fermenting for 2 full weeks, the yeast may still need more time to finish fermenting. This can be caused by cold temperatures or a delayed initial fermentation.

-
- Use a hydrometer to calculate the sugar content (gravity). Samples of beer, one taken on brew day & another before bottling, are compared to calculate the ABV. As beer ferments, the yeast converts sugars into alcohol. So the sugar content will decrease throughout fermentation. A hydrometer reading taken before bottling day can help you calculate how close your beer is to the target ABV. If you’re far off, your beer isn’t ready to bottle (too much sugar is still present in the beer). If you’ve hit the ABV, you’re clear to bottle!
-
- Going on vacation? Trying to bottle early? DON’T. When in doubt, always leave your beer in the fermenter if you run into scheduling issues. Beer will be safe in the sealed fermenter even once fermentation is complete.
What you’ll need to bottle your beer – a checklist
An all-in-one beer brewing kit, like Craft a Brew’s First Time Homebrewer Set, will include most everything needed to bottle your beer. Those items are listed in bold among the comprehensive bottling day checklist below.
Be sure to round up your bottling day essentials well in advance & double check that you have everything you need.

-
- Racking cane or auto-siphon
- Transfer tubing & tube clamp
- Sanitizer
- Funnel
- Large stock pot (or bottling bucket for a 5 gallon batch)
- Bottles (pry-off bottles OR swing-top bottles – more on this in the next section)
- Ten 12oz bottles for a 1 gallon batch
- Fifty 12oz bottles for a 5 gallon batch
- Crown bottle caps (if using pry off bottles, 1 for every bottle)
- Capper (if using pry off bottles)
- White table sugar
- 2 Tablespoons for a 1 gallon batch
- ⅔ cup for a 5 gallon batch
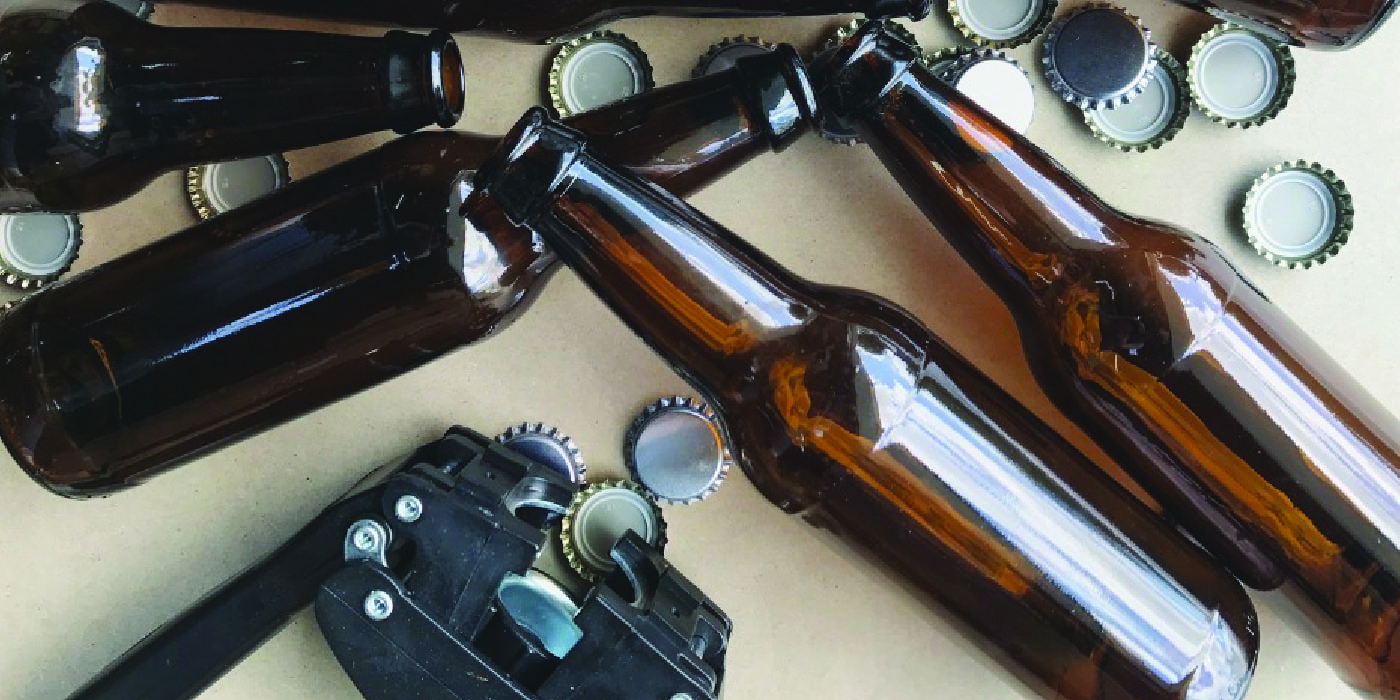
Choosing the right bottles

Amber or green beer bottles are ideal for bottle conditioning because they protect better against UV light. “Light strike” can cause skunk, sulphuric or wet-dog flavor in your beer – a reaction that happens when light-sensitive hop compounds are exposed to UV light. Keeping your bottles away from windows is always recommended, but dark bottles provide an extra layer of protection.
Pry-off bottles
Whether recycled or brand new, pry-off beer bottles & crown caps are popular with homebrewers.
If you’re an avid craft beer drinker, saving your empties is a cost effective choice for bottling. We like to think of every trip to the liquor store as “free bottles!” Just be sure to avoid twist-off bottles & give your empties a rinse before storing them to prevent mold or bacteria growth.
How to remove bottle labels: Many homebrewers prefer to remove the labels. To do so, simply mix a solution of sanitizer (powdered packets or StarSan work well) & water. Soak bottles overnight to loosen the labels. With little effort you can peel or rub them off with your hands. Nail polish remover helps with any sticky residue.

With your bottles accounted for, you’ll just need bottle caps & a capper tool to seal them. Try Craft a Brew’s Capping Kit, designed for brewers who already have pry-off bottles.

First time bottling? Try a Deluxe Bottling Kit – this all-inclusive bundle comes with ten 12oz amber beer bottles, 30 bottle caps & a capper tool.
Swing top bottles

You can buy swing-top bottles brand new or recycle them. Grolsch Pilsner is a common swing-top bottled beer found at the liquor store. The bottles are green, which help protect against lightstrike.
Swing top bottles don’t require caps or a capper tool because their reusable seal is attached to the bottle. Down the road you may find that the gaskets on swing-tops require replacing. Swing-tops are a great option overall because they require less home brew kit equipment to bottle your beer.
Plastic bottles
20 oz plastic soda bottles can be used in a bind, though they aren’t our first choice. They’re designed for carbonated beverages and the labels are easy to remove. But, the material can harbor bacteria over time and the clear plastic can also leave beer more prone to light strike.
A unique benefit of plastic: the flexible material means you can FEEL when your beer is carbonated by squeezing to see whether the bottle is firm or is still compressible.
Sanitizing your bottles
You’ve come this far! Don’t squander a batch of beer in the home stretch by skimping on sanitation. It’s just as important to thoroughly sanitize now as it is on brew day.
Your beer is ‘alive’ with yeast, so you want to be sure that no other bacteria are present in bottles during the 2 week conditioning phase.
Inspect & clean your bottles
If you’re reusing beer bottles it’s best to give them a rinse as soon as you finish the beer inside to remove any beer, sediment or biofilms. Even if you’ve purchased brand new bottles, it’s a good idea to give them a rinse with warm water to remove any dust. Allow bottles to dry (preferably upside down) before storing to prevent mold or mildew. It’ll be much easier to work with clean bottles vs. having to use a bottle brush to scrub off any caked on gunk.
Remember, cleaning & sanitizing are two different processes. Cleaning simply removes dirt or visible surface-level gunk, while sanitizing involves using a chemical solution to remove mold, wild bacteria & yeasts from equipment. Both processes are very important, but very different.
Soak & sanitize your equipment
You’ll need to sanitize any tools that will come in contact with your beer & bottles. This includes your racking cane or auto-siphon, transfer tubing, bottles, caps & a spoon. Craft a Brew’s 1 gallon beer kit includes a packet of powdered oxygen-based sanitizer. If your kit doesn’t come with sanitizer, try an acid-based solution like StarSan. One concentrated bottle will last for a long time – use 1 oz per 5 gallons of water.
Create your sanitizing solution by mixing half your packet of sanitizer (or 0.2 oz of StarSan) with a gallon of water in a pitcher or bucket. Soak all of your components in the solution for 60 seconds each to sufficiently sanitize. Place everything on a fresh sheet of paper towels or a bottle tree to drip dry.
Note – sanitizer is safe to come in contact with your beer in trace amounts. Most modern, popular sanitizing solutions are “no-rinse,” meaning that you don’t need to rinse the sanitizer off of your bottles. Be sure to check the packaging or instructions on whichever sanitizing solution you use.
Creating priming sugar
At this point you’ll need to create a priming solution. This sugar mixture provides residual yeast with fuel to create carbonation in bottles.
For a 1 gallon batch of beer, you’ll combine exactly 2 Tablespoons of white table sugar and 1.5 cups of water in a large pot. (Mix ⅔ cup of sugar and 2 cups of water if bottling a 5 gallon batch.) Heat on medium-high heat and stir the sugar until fully dissolved. Boil for 5 minutes, then remove from heat, cover with a lid & let cool.
White table sugar or corn sugar (dextrose) are preferred sugars for carbonation because they are neutral and won’t add any unwanted flavors to your finished beer. Honey, brown sugar or molasses, for instance, are not desirable sugars because their sugar content can vary and they can add flavors that may not be suitable to the beer style. If you want to use other sugars to prime your beer, we suggest using a priming sugar calculator to make adjustments.
You may have seen carbonation drops or tablets at your local homebrew shop. These are made of sugar and are meant to be dropped directly into each bottle of beer. We don’t personally recommend using these because carbonation from bottle to bottle can be inconsistent.
How to use home brew kit equipment to bottle your beer

Starting a siphon
Once the pot & sugar have completely cooled, it’s time to transfer your fermented beer into the pot. This transfer makes certain that the sugar is evenly distributed throughout your beer. The siphon technique also helps draw your beer out of the fermenter while leaving sediment behind.
To start a siphon you’ll need to round up a few items:
- Large bowl of fresh, clean water
- An empty glass or small bowl
- Transfer tubing & tube clamp
- Racking cane or auto-siphon
- A towel
You’ll need a clean countertop or table and ample room on the ground below. Distance between your carboy and the pot is crucial – gravity is your best friend in this process. Set your carboy on a high surface and your pot down on the ground. This height distance is key to creating & maintaining a siphon flow. You may want to lay a towel down on the ground to catch any spills or drips.
Step 1: Attach tube clamp
Slide your tube clamp on to one end of your tubing – this will be the draining end. The clamp is used to start and stop the flow of beer. It’s a good idea to practice clamping and unclamping a few times before you begin so you get the hang of it.
Step 2: Fill tubing with water
Fill your transfer tubing as much as you can by submerging it into a bowl of water. Use the sink if you need to top it off. The fuller the tubing, the easier it will be to start & maintain the siphon flow.
Step 3: Insert your racking cane (or auto-siphon)
Close the tubing clamp & attach the unclamped end to your racking cane. If the tubing isn’t sliding on to the racking cane, wet both ends to reduce friction. You can also run the tubing under warm water to make it more pliable. Place the racking cane, with the black filter tip attached, into the fill carboy.
Step 4: Siphon into the pot
To get the siphon flowing, you’ll hold the clamped end of tubing over an empty glass or bowl on the ground. Be sure to do this as low to the ground as you can (use gravity to your advantage). The water in your tubing will drain out, beginning a downward flow that will draw your beer out of the carboy. Close the clamp as soon as you start to see beer moving through the tubing.
Unclamp your tubing over the pot of priming sugar & let the siphon drain your carboy. As the fill line gets low, tilt the carboy and keep the tip of the racking cane submerged. Once beer is completely transferred to the pot, stir gently with a sanitized spoon to combine.
-min")
It’s much easier to start a siphon with a buddy – an extra set of hands on bottling day is always a good idea! But if you’re bottling solo, an auto-siphon will prove helpful (frankly, it’s the best $10 you’ll spend on your homebrewing hobby). With an auto-siphon there’s no need to fill tubing with water to start the flow. A few pumps of this tool and the siphon is started in a snap!
Filling & capping your bottles

Now that your beer is primed and ready to carbonate, you’ll repeat steps 2 – 4 to siphon from the pot into your bottles. Place the pot on a countertop or table and your bottles on the ground. As you fill one, close the clamp to stop the flow. Set the bottle aside and quickly grab your next one.
Fill bottles to where the base of the neck meets the bottle. The ullage (fill line) is important for carbonation. Leaving too much headspace (or even too little) can cause carbonation complications.
Cap pry-off bottles with a capper OR secure the swing top bottles with the seal to prepare them for storage.
")
Conditioning your beer
Once bottled & sealed, your beer will need to condition for 2 weeks at room temperature. During this time yeast convert priming sugar into CO2, while the flavors and mouthfeel of your beer will be refined and matured.
Be sure to store the bottles out of direct sunlight to prevent light strike. Depending on your environment and the time of year, your bottles may need a temperature boost. Cold temperatures will cause the yeast to go dormant in bottles, so be sure to store the bottles in a ~70 °F location. Avoid storing bottles on cold basement or garage floors, as these surfaces tend to be colder than the ambient temperature of the room.
Higher ABV beers, like Craft a Brew’s Oak Aged IPA or Belgian Abbey Dubbel, can benefit from longer bottle conditioning. Such beers can be stored in bottles for 3 weeks before they should be refrigerated.


Leaving beers unattended beyond the recommended aging timeline can lead to bottle bombs, because the pressure will continue to build and the yeast will continue to feast. Don’t leave conditioning bottles unattended. Bottling right before a long vacation, for instance, isn’t recommended.
How to use home brew kit equipment to test carbonation levels
After your beer has conditioned for 2 weeks (or the recommended time frame), move a bottle to the fridge to chill. Remember, your beer is “alive” with yeast inside – so be sure to handle bottles with care.
Once chilled, open the bottle and listen for a hiss or pop. Next, watch the beer as you pour into a glass. Are you seeing typical bubbles and a foamy head develop as you pour? Finally, drink! Take that first glorious sip of your fermentation creation.
If everything is carbonated to your liking, transfer the rest of the bottles to the fridge to lock in the carbonation. If the carbonation is weak or the beer is still flat, keep the rest of the bottles out at room temperature for another 2-5 days before chilling & testing another.
Allowing your bottles to sit in the fridge once carbonated is a great way to naturally separate sediment, improve your beer’s clarity & produce a professional quality appearance in your glass. Over roughly 1 week, any remaining yeast in the bottles will fall out of suspension and compact to the bottom of the bottle, resulting in clearer beer.
Serving your bottle conditioned beer

Handling with caution is important with bottle conditioned beers. Be sure not to agitate them, shake or swirl them, as this can reintroduce sediment. Sediment will naturally settle at the bottom of any bottle conditioned beer. The best way to prevent this from getting into your beer glass is to pour slowly and leave the last ounce behind in the bottle.
Let’s recap! How to use home brew kit equipment to bottle condition
- Bottle conditioning is just as important as brew day or fermentation. Be thorough with cleaning & sanitizing practices to avoid contamination in bottles.
- You can buy new bottles or recycle your empties. Don’t use clear glass bottles. Be sure to rinse & dry bottles before storage to prevent mold growth.
- Temperature, time & sugar are crucial to successful conditioning. Maintain the recommended temperature ranges during bottling. Never bottle early. Be precise with priming sugar additions.
- Review the bottling day checklist and source items ahead of time. Recruit a friend so you have an extra set of hands on the big day.
- Practice starting a siphon at least once before bottling day. If it’s too daunting for you, remember that an auto-siphon may be the best $10 investment you make in your homebrewing journey.